Thursday, August 10, 2023

Pesto

 Posting here so I can easily find it again.

  • 2 cups fresh basil leaves, packed (can sub half the basil leaves with baby spinach)

  • 1/2 cup freshly grated Romano or Parmesan cheese (about 2-3 ounces)

  • 1/2 cup extra virgin olive oil

  • 1/3 cup pine nuts 

  • cloves garlic, minced (about 1 tablespoon)

  • 1/4 teaspoon salt, or more to taste

  • 1/8 teaspoon freshly ground black pepper, or more to taste


  • Pulse the basil and nuts in the food processor.
    Add garlic and cheese.
    Drizzle in olive oil. Finish with salt and pepper.
    It made enough for the pesto Cavatappi recipe with a little left over. 
    If you want to freeze the pesto, omit the cheese (it doesn't freeze well). Line an ice cube tray with plastic wrap, and fill each cube with the pesto sauce. Freeze and then remove from the ice tray and store in a freezer safe, zip-top bag. When you want to use it, defrost and add the grated Parmesan or Romano.

Pesto Cavatappi

 An awesome copycat of my Noodles and Company favorite.

  • 1 tablespoon Salt
  • 1 pound cavatappi pasta
  • 1 teaspoon olive oil
  • 1 large tomato cored and diced
  • 4 ounces mushrooms sliced (optional, see note 2)
  • 1/4 cup chicken broth or vegetable broth
  • 1/4 cup dry white wine (see note 3)
  • ¼ cup heavy whipping cream
  • 1 cup homemade pesto or store-bought (see note 4)
  • 1 cup shredded Parmesan cheese

    • In a large saucepan or stock pot, bring 4 quarts of water and salt to a boil. Add pasta and cook until al dente, about 10 to 12 minutes. Drain well.
    • Meanwhile, heat oil in a large skillet over medium-high heat until shimmering. Add tomatoes and mushrooms (if using) and cook for about 5 minutes, until some of the liquid has been released and the tomatoes are heated through.
    • Stir in the broth, wine, and cream and bring to a boil; reduce heat to medium and cook until the sauce has thickened slightly, about 2 minutes.
    • Add pesto and stir until heated through, about 2 minutes. Add pasta and toss until uniformly coated in the sauce. Transfer to a serving dish or individual plates and garnish with Parmesan cheese.
    • NOTES
      Excellent! 
      I didn’t have mushrooms but did have peppers.
      Didn’t have white wine on hand but that would be good.
      I added a bunch of rotisserie chicken. Shrimp would also be good.

Friday, August 4, 2023

Dill Pickles

 Excellent recipe shared by Caroline Langfeld.

12 lb 3-5 inch pickling cucumbers

Salt Water Soak:
2 gallons water
3/4 C pickling salt

Brine:
2 quarts water
7 1/3 C vinegar
3/4 C pickling salt
1/4 C sugar

Per Quart:
3-4 garlic cloves
2-3 dill heads (I also add some of the dill 'stalk')
6-8 black peppercorns
1 small dried Chile pepper - optional - I usually do a few jars with these, but I don't like the extra zip so leave it out of most jars.
4-6 grape leaves - optional - I've never tried these; I'm a creature of the familiar and I like the recipe without, so why mess with something I know I like.

Makes about 8 quarts
  
  1. Gently wash the cucumbers, and remove the blossom ends.  Halve or quarter lengthwise, if you choose, or leave them whole.  In a large bowl or crock, dissolve 3/4 C pickling salt in 2 gallons water.  Add the cucumbers.  Let them stand in the brine 8-12 hours. 
  2. Bring to a boil the 3/4 C salt, 2 quarts water, the vinegar and sugar, stirring to dissolve.  While the mixture heats, divide the garlic, dill and peppercorns, and the pepper and leaves if you're using them, among 8 quart jars.  Pack a portion of the cucumbers into each jar.
  3. Pour the hot liquid over the cucumbers, leaving 1/2 inch head space.  Close the jars with hot two-piece caps.  In a boiling water bath, process pint jars for 10 minutes and quart jars for 15 minutes.
  4. Store the cooled jars in a cool, dry dark place for at least 1 month before eating the pickles.

NOTES:
I'm going to make a much small batch this evening.  Notes are coming soon.

Friday, July 28, 2023

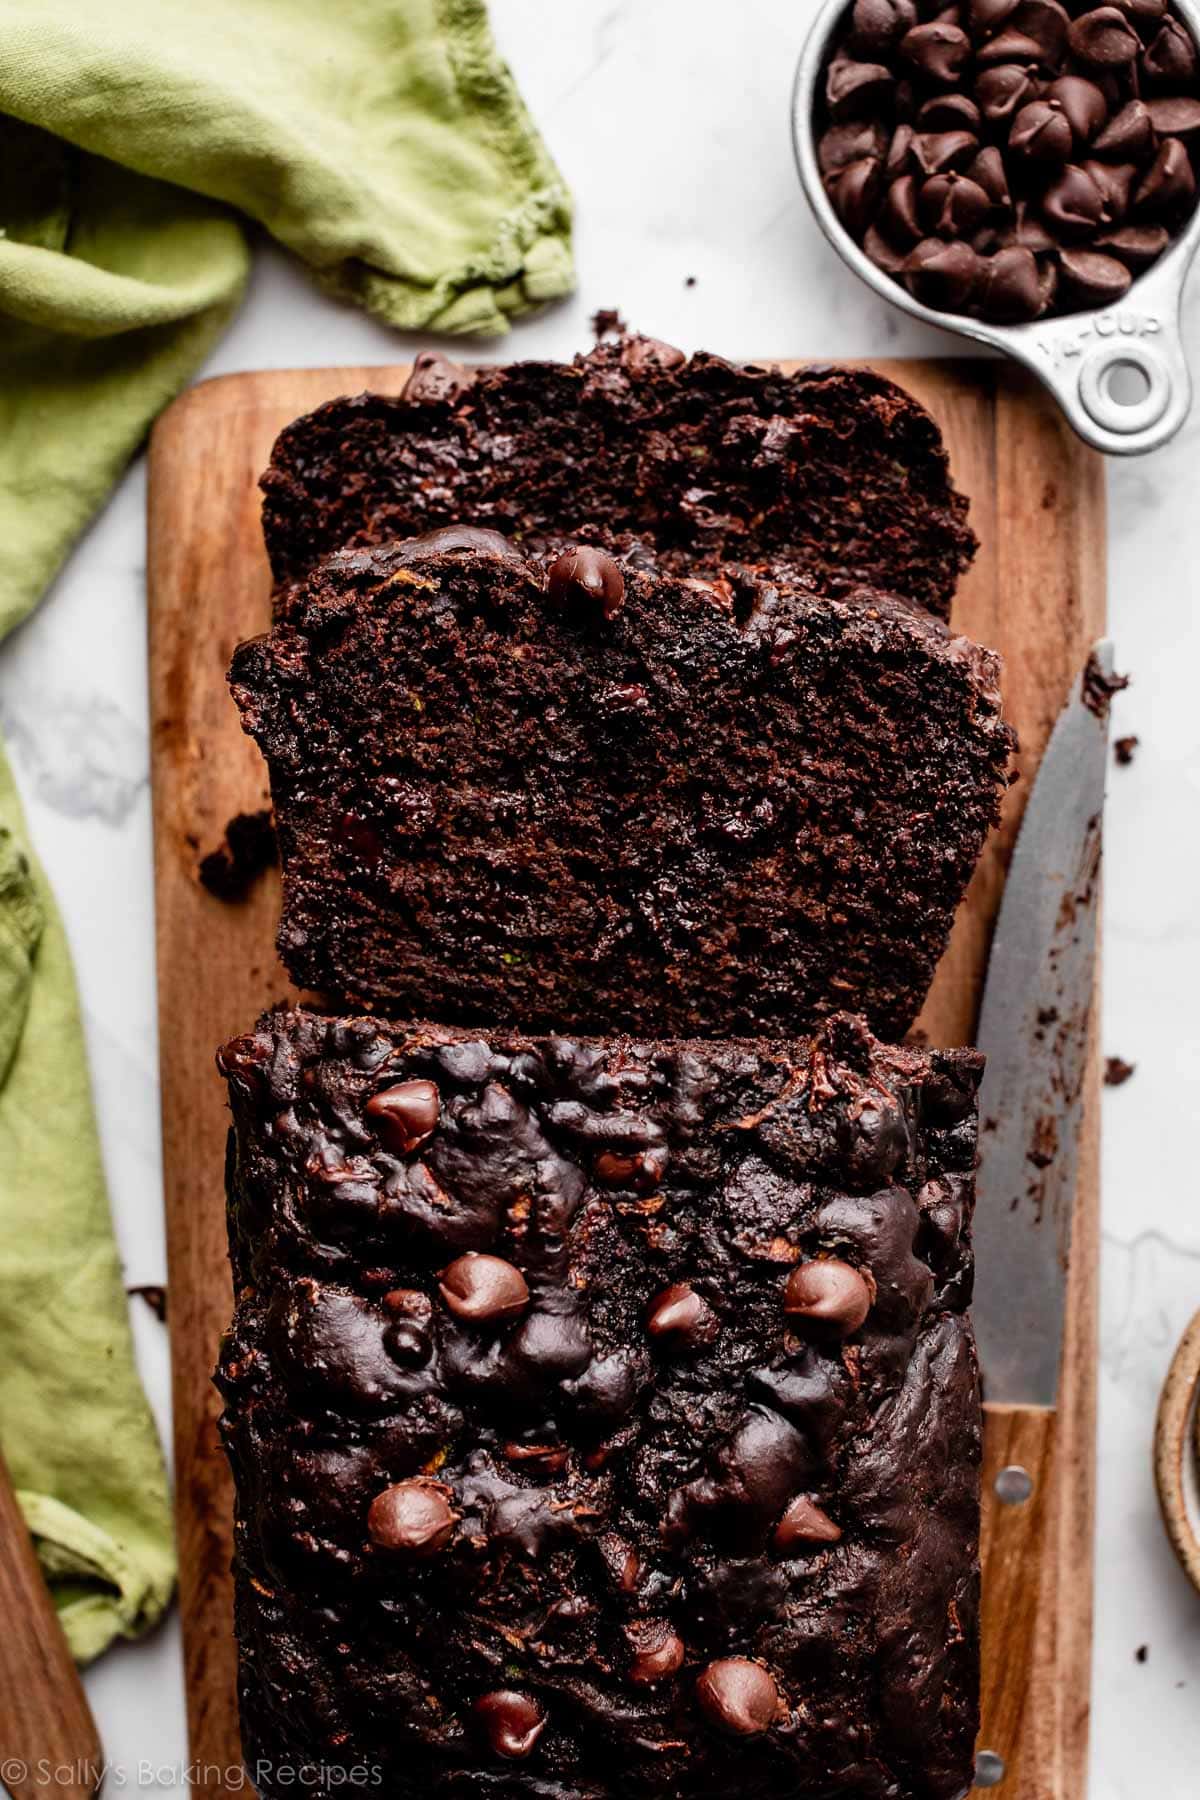
Double Chocolate Zucchini Bread


  • 1 cup (125gall-purpose flour 
  • 1/2 cup (41g) unsweetened natural cocoa powder (not Dutch process)*
  • 3/4 teaspoon baking soda
  • 1/4 teaspoon baking powder
  • 1/4 teaspoon salt
  • 1/2 teaspoon espresso powder*
  • 3/4 cup (135g) semi-sweet chocolate chips*
  • 2 large eggs
  • 1/4 cup (60ml) vegetable oil or melted coconut oil
  • 1/3 cup (80g) plain Greek yogurt or sour cream*
  • 2/3 cup (135ggranulated sugar*
  • 1 teaspoon pure vanilla extract
  • 1 and 1/2 cups (180g) shredded zucchini (no need to blot)*
  1. Preheat oven to 350°F (177°C). Grease a 9×5-inch loaf pan or 8×4-inch loaf pan (for a taller loaf) with nonstick spray. Set aside.
  2.  In a large bowl, whisk the flour, cocoa powder, baking soda, baking powder, salt, and espresso powder together until combined. Mix in the chocolate chips. Set aside.
  3. In a medium bowl, whisk the eggs, oil, yogurt, granulated sugar, and vanilla together until combined. Slowly pour the wet ingredients into the dry ingredients and gently whisk to combine. Fold in the zucchini. The batter is very thick.
  4. Bake for 45–55 minutes, making sure to loosely cover the bread with aluminum foil halfway through to prevent the top from over-cooking. The bread is done when a toothpick inserted in the center comes out clean with only a few small moist crumbs. The 9×5-inch pan takes closer to 45 minutes, and the 8×4-inch pan takes closer to 55 minutes. All ovens vary, so begin checking around the 45-minute mark.
  5. Remove bread from the oven and allow the bread to cool in the pan set on a wire rack for 1 hour. While it’s still warm, I gently press a few more chocolate chips into the top; this is optional and only for looks.
  6. Remove bread from the pan and place the loaf directly on the wire rack to cool completely.
NOTES:
I used mini chocolate chips but otherwise made it as written. Easy and excellent!
Hat tip to the ever-excellent Sally’s Baking Addiction

Monday, July 3, 2023

Sour Cherry Jam (low sugar)


Ingredients

  • 5 pounds sour cherries pitted
  • 1 pound 3 ounces granulated sugar
  • 1 tablespoon + 1 teaspoon calcium water
  • 1 tablespoon + 1 teaspoon Pomona's Pectin

Instructions

  • Prepare a boiling water bath canner and enough jars to hold 4 pints.
  • In a low, wide, non-reactive pot, combine the pitted cherries, 1 pound of sugar, and all the calcium water.
  • Set pot over high heat and bring to a rolling boil. Reduce heat to medium-high and cook at a vigorous boil for 20 to 25 minutes, until the volume has reduced by at least one-third.
  • Stir pectin into the remaining sugar and stream it into the cooking jam, using a whisk to stir to help prevent clumps.
  • Return the contents of the pot to an active boil and cook for an additional 2 minutes and then start looking for signs of thickening (it should be pretty clear as Pomona's pectin sets quickly). Once you see some thickening, remove the pot from the heat.
  • Funnel the jam into the prepared jars, leaving 1/2 inch headspace. Wipe the rims, apply lids and rings, and process in a boiling water bath canner for 10 minutes.
  • When the time is up, remove the jars and set them on a folded kitchen towel to cool. When the jars have cooled enough that you can comfortably handle them, check the seals. Sealed jars can be stored at room temperature for up to a year. Any unsealed jars should be refrigerated and used promptly.
NOTES:
  • From the Food in Jars site: Now, for the pectin. I like to use less pectin that the Pomona’s packet instructions call for. Typically, I use between 1/2 and 3/4 teaspoon calcium water and pectin for every pound of fruit. Use less for a soft set and a bit more for a firmer set.
  • The cherries were easy to pit and that worked better than the food mill.
  • I made a half batch from cherries on our backyard tree.

Patriotic Jello Jigglers

 Ingredients
2 3-ounce boxes strawberry Jello
2 3-ounce boxes berry blue Jello
14 ounce can sweetened condensed milk
4 0.25-ounce envelopes unflavored gelatin (i.e. Knox)
Boiling water

Instructions
  • Spray an 8-inch or 9-inch square baking pan with nonstick cooking spray.
  • In a small bowl, stir together 1 box of the strawberry Jello, ½ an envelope of the Knox gelatin and 1 cup of the boiling water, ensuring everything has dissolved. Pour into the prepared pan and place in the refrigerator to set, about 15 minutes.
  • Meanwhile, in a medium bowl, stir together the sweetened condensed milk and 1 cup boiling water. In a separate small bowl, sprinkle 2 envelopes of the unflavored gelatin over ½ cup cold water. Allow to sit for 5 minutes. Add ½ cup boiling water to the unflavored gelatin mixture and stir to dissolve. Pour into the sweetened condensed milk mixture and stir to combine.
  • Once the red layer is set, pour 1 cup of the milk mixture over the red layer. Place in the refrigerator for at least 15 minutes.
  • Repeat the layers, alternating the red and blue between the white layers, with blue being your last layer. Ensure that the colored Jello mixtures cool to room temperature before pouring over the previous set layer.
  • Once all of the layers have been poured, refrigerate for at least 4 hours. When ready to serve, run a thin knife around the edges of the pan and turn the Jello out onto a cutting board. Cut into squares and serve, refrigerating any leftovers.
NOTES:
  • A 1/2 pack of knox gelatin is about 1.25 teaspoons
  • This goes quicker than it looks.  As soon as one layer goes in the fridge, make the next one, and it's cooled off a bit by the time you add it. (15 minutes or so).
  • I made it my square rubbermaid container (a little bigger than 9"). Photo as a reminder for next time.
  • Having a level shelf in your fridge is helpful.


Monday, April 3, 2023

Steak Marinade

 Marinade steaks between 2 hours and overnight.


  • 1/3 cup soy sauce
  • 1/3 cup lemon juice
  • 1/2 cup olive oil
  • 1/4 cup Worcestershire sauce
  • 1 Tablespoon minced garlic
  • 2 Tablespoons Italian seasoning
  • 1 teaspoon pepper
  • 1/2 teaspoon salt
  • pinch of red pepper

Monday, January 30, 2023

Meyer Lemon Marmalade

I brought some lemons back from CA (and bought more at Costco) with the intention of trying to make lemon marmalade again. Last time was good, but a little overcooked. This time I got lucky and it's pretty close to perfect.

INGREDIENTS

  • 1.5 pounds Meyer lemons
  • 2.5 cups sugar
  • water (3 cups needed for the actual jam recipe, but start with more for boiling)
  • Pomona's Pectin (I bought this in CA.  Not sure if it's available locally, but it's really a unique product that allows me to successfully make jam with less sugar.  It's a 2 step process - definitely different than using SureJell, so read the directions carefully.)

PREPARE THE PECTIN 

  • Prepare the Calcium Water.  To do this, combine ½ teaspoon calcium powder (in the small packet in your box of Pomona’s pectin) with ½ cup water in a small, clear jar with a lid. Shake well.  Extra calcium water should be stored in the refrigerator for future use.
  • For this recipe, mix 4.5 teaspoons of pectin powder with 2.5 cups of sugar. 

SOFTEN THE LEMON PEELS

  • 1.5 pounds of washed Meyer lemons (round the weight up if necessary, but don't cut a lemon to keep it at 1.5 pounds. I weighed 1 lb, 12 ounces for this batch.)
  • Place in a single layer in a pot, cover with water, bring it to a boil then reduce heat and simmer for 25 minutes. (Cover with a lid to keep your water from evaporating.)
  • Cool until you can work with them.
  • Save the cooking water.

COMBINE INGREDIENTS 

  • Cut each lemon in half and remove the seeds.  The lemon is pretty broken down after all that simmering, so use a cutting surface that will hold the juice that tries to escape.
  • Peels and all, put them in the blender with 3 cups of the cooking water. (I divided the lemons and water in half to do this in 2 steps.  Not sure my blender would have held it all and I didn't want to overprocess it.)  
  • I processed it on my slow pulse setting so it would roughly chop but not puree.
  • Pour it into a pot and bring the water and chopped lemons to a boil.
  • add 3 teaspoons of prepared Calcium Water (1 part of the Pomona's process)
  • Add pectin-sugar mixture, stirring vigorously for 1 to 2 minutes to dissolve the pectin while the marmalade comes back up to a boil.  Once the marmalade returns to a full boil, remove it from the heat.
PROCESS THE JARS
  • Fill hot jars to ¼” of top. Wipe rims clean. Screw on 2-piece lids. Put filled jars in boiling water to cover. Boil 10 minutes (add 1 minute more for every 1,000 ft. above sea level). Remove from water. Let jars cool. Check seals; lids should be sucked down. Eat within 1 year. Lasts 3 weeks once opened.
NOTES (as if I needed more):

Food in Jars has a more traditional marmalade recipe but it's lemon ginger.  That sounds pretty great so I might use my extra lemons along with a tube of Aldi Ginger Paste to try this all over again.

I used bits and pieces of all these recipes.  Take a look if you want to refer to someone who knows what they're talking about.

  • https://pomonapectin.com/orange-marmalade/
  • https://foodinjars.com/recipe/meyer-lemon-ginger-marmalade/
  • https://foodinjars.com/recipe/honey-sweetened-meyer-lemon-jam/
I'm pretty sure this is all firmly in the ranks of rambling, poorly written recipes, but since there are basically 5 readers, I'm not too concerned.  LMK if something is unclear and I'll update.

Monday, January 23, 2023

90 Minute Man Bread (aka My New Favorite White Bread?)

 Taken from Don't Waste the Crumbs.
(My notes at the bottom.)

  • 1-1/2 cups of warm water (105-115 degrees)
  • 1 Tbsp honey
  • 2-1/4 tsp active-dry yeast
  • 2 Tbsp coconut oil, melted
  • 4 cups all purpose flour
  • 1-1/2 tsp salt
  • Vital wheat gluten - 1 Tbsp per cup flour (optional)
1) If your kitchen is not warm, turn your oven to low. This is simply to warm your kitchen up a little bit (since it’s cool where we live).

2) In your mixer bowl add warm water, honey, and yeast. Stir a few times until honey dissolves. Once yeast starts foaming (5 minutes or so), add flour, melted coconut oil, and salt. Using dough hook, knead for 10 minutes on low/medium low. Leave your dough ball in the bowl and cover with a towel. Let rise for 30 minutes.

3) After the first rise, lightly flour a surface and scoop your dough ball on it. Knead your lump of dough by hand a few times, until it forms a firm ball. Cover this ball of dough with a towel.

4) Preheat oven to 400 degrees. If you have a pizza stone, make sure this is in the oven to warm up. Alternatively, you can use a cast iron skillet while the oven is preheating – as one reader had great luck with! (Note: We have only tested this recipe with a pizza stone.)

5) Let rise for 30 minutes.

6) After the second rise, place dough ball directly on pizza stone, cut two slits on the top of the dough ball and bake for 25 minutes at 400 degrees. If you are using a loaf or cast iron skillet, the cook time may need to be increased an additional 10-15 minutes. (bread is done when the internal temp is 220 degrees).

7) Let cool and enjoy.

NOTES

*We move this dough from the counter to the pizza stone, but if you don’t feel confident in that transition, flour a piece of parchment paper and shape the dough on that for the second rise. Then move the entire paper with the dough to the oven for baking.
**Vital wheat gluten is optional but helps create a more pliable, softer loaf.

Jenny's Notes:
  • This is a very easy recipe and makes a very soft, pleasant bread (probably even good for sandwiches, although we've only had it by itself).
  • I used Heritage White Flour and omitted the Vital Gluten.
  • I baked it in my dutch oven on parchment paper.
  • I baked it a little longer than 25 minutes (probably about 30).  It hadn't reached 220 degrees, but I took it out of the oven 1) because I had somewhere to be and 2) because it seemed done on the outside.  It was cooked all the way through.
Jonah-approved!

Friday, January 13, 2023

Pizza crust - Gerardi method

 5 stars!

I used the Sallys Baking Addiction recipe - https://sallysbakingaddiction.com/homemade-pizza-crust-recipe/#tasty-recipes-66436

  • I mixed it at lunch time so it had lots of time for the yeasty taste to develop. (Probably not essential)
  • To bake, I preheated the oven to 475 with a baking sheet inside to heat up.
  • I rolled out the crust on a silicone mat.
  • Brush it with olive oil where the sauce will be to keep it from getting soggy.
  • Add sauce and toppings and slid it onto another inverted baking sheet to make it easier to transfer to the hot pan.
  • When the oven was hot I pulled out the pan and butted up against my inverted baking sheet so I could easily slide it all onto the hot pan. An extra set of hands would probably make all that unnecessary.
  • Bake 10 minutes on the bottom rack and maybe 4 more on the top.
It slid onto a cutting board easily.

NOTES: 
  • Holly uses parchment paper at 450.
  • Johnny uses a silpat and 500 degrees.
  • They both use TJs crust
  • Sallys recipe filled the baking sheet with a thicker crust than I usually make. Next time I’ll probably try 2 thinner crusts.
  • Fwiw, I added Italian seasoning and garlic powder to the crust. It was good.


Spaetzel


  • 4 cups all-purpose flour
  • 2 tsp salt
  • 8 large eggs
  • 3/4 cup milk
  • In a bowl, whisk together the flour, eggs, milk, and salt. Stir until the batter is well combined and develops bubbles. You can also use a mixer. The batter should neither be too thin nor too thick or it will be difficult to make the spaetzle with your spaetzle maker. Let the batter sit for 5-10 min.
  • Put a colander into a bowl to drain the Spaetzle once cooked and bring a large pot of water over high heat to a boil, add about 1 Tbsp of salt to the water, and reduce temperature to a simmer.
  • Press batter through a spaetzle maker, a large holed sieve or colander into the simmering water.
  • Work in batches, after using about 1/3 of the batter stop adding new spaetzle and let them cook for about 2-3 minutes, or until they float to the top. Stir occasionally. Use a slotted spoon to transfer the spaetzle to the colander so that excess water can drip off.
  • Serve the spaetzle immediately or saute them in butter to crisp them up a little. If you don't serve or saute them right away, add 1 or 2 Tbsp of butter to the hot spaetzle to prevent them from sticking together.

NOTES

UPDATE 10/23/19: Recipe has been re-tested because of reader feedback and amount of milk has been increased from 1/3 cup+2 Tbsp to 3/4 cup of milk.
  • This makes a big batch of Spaetzle that is perfect for a big family dinner.
  • Clean used equipment with cold water, the dough is very sticky and gets stickier when using hot water.
  • Leftover Spaetzle can be stored, tossed with some melted butter, in an airtight container in the fridge for 3-4 days. To reheat, saute them in some butter.