Showing posts with label Category - Dessert. Show all posts

Saturday, September 20, 2025

Cookie Pizza

This would be a fun choice if you’re bringing dessert somewhere. Quick to make, cute to serve. 


Ingredients

  • 2 cups (250gall-purpose flour (spooned & leveled)
  • 2 teaspoons cornstarch (aka cornflour)
  • 1 teaspoon baking soda
  • 1/2 teaspoon salt
  • 3/4 cup (12 Tbsp170gunsalted buttersoftened to room temperature
  • 3/4 cup (150g) packed light or dark brown sugar
  • 1/4 cup (50ggranulated sugar
  • 1 large egg, at room temperature
  • 2 teaspoons pure vanilla extract
  • 1 and 1/4 cup (225g) semi-sweet chocolate chips
  • optional for serving: ice cream, vanilla buttercream, sprinkles

Instructions

  1. Preheat oven to 350°F (177°C). Lightly grease your 12-inch or larger pizza pan. (No smaller than 12 inches.)
  2. Whisk the flour, cornstarch, baking soda, and salt together in a medium bowl. Set aside.
  3. Using a hand mixer or a stand mixer fitted with paddle attachment, beat the softened butter and both sugars together on medium speed until creamy and smooth, about 3 minutes. Add the egg and vanilla extract and beat on high speed until combined, about 1 minute. Scrape down the sides and bottom of the bowl as needed.
  4. Add the dry ingredients and beat on low speed until combined. With the mixer running on low, add the chocolate chips. Dough will be thick, soft, and sticky.
  5. Transfer the cookie dough to the pizza pan and flatten out with your fingers until it’s around 3/4 inch thick. You do not want it to reach the edges of the pan; keep it thick and centered.
  6. Bake for 20–24 minutes or until puffed and lightly browned on top. Do not over-bake.
  7. Allow the cookie pizza to cool on the pan set on a cooling rack before garnishing/slicing. While the cookie pizza is still warm, I like to press a few chocolate chips into the top. This is optional and only for looks.
  8. Cover leftovers and store at room temperature for 2–3 days or in the refrigerator for up to 5 days.
  9. NOTES: Mini chips were a cute choice. Lots of butter, but worth it. Serve with a little ice cream. Holds its shape even when cut into small wedges.
  10. Sally’s Baking Addiction. https://sallysbakingaddiction.com/chocolate-chip-cookie-pizza/

Saturday, September 6, 2025

Upscale Rice Krispie bars

This is more about the equipment than anything. The silicone mold is super cheap at Hobby Lobby (almost always on sale). You’ll need a circle cutter the same size - 2”. I had to go to Lynn’s for this one because mine is awol. Anyway, I pressed the Aldi ingredients into an oversized cake pan I happen to have and ended up with 48 bars.


You can remold scraps. Use whatever chocolate you have on hand - just spoon a tablespoon (or a little less) in each mold and pop it in the refrigerator for a couple minutes before unmolding. 

If you want them to be even better, try Smitten Kitchen’s brown butter krispie bar recipe. 

The jimmies are from Gygi and are pretty amazing! They taste like actual chocolate rather than nasty wax. If you order jimmies, get their small silicone bowl too. It’s a game-changer for melting chocolate.

Thursday, March 28, 2024

Earl Grey Rice Pudding

 4 cups milk

½ cup white sugar

½ cup long-grain white rice

1 tablespoon butter

1 large egg

2 tablespoons milk

½ teaspoon vanilla extract

⅛ teaspoon salt

1 Earl Grey teabag (I used Stash)


Directions

  • Stir 4 cups milk, sugar, and rice together in a slow cooker until sugar dissolves. Add butter and the teabag, cover, and cook on High for 2 1/2 hours.
  • Whisk egg, 2 tablespoons milk, vanilla, almond extract, and salt together in a bowl.
  • Pour a small amount hot rice mixture into egg mixture, whisking quickly so egg doesn't cook. Pour mixture back into the slow cooker and whisk until combined. Continue to cook on High until creamy, about 15 more minutes.
  • Transfer pudding to a glass baking dish. Cover with plastic wrap leaving two corners uncovered to vent, and refrigerate until chilled completely, at least 1 hour.
NOTES:
This is crazy-easy to do in the crock pot!
The original recipe had almond extract and no tea bag.
The Earl Grey flavor is subtle and delicious. Best served warm and maybe with a little whipped cream.

Friday, July 28, 2023

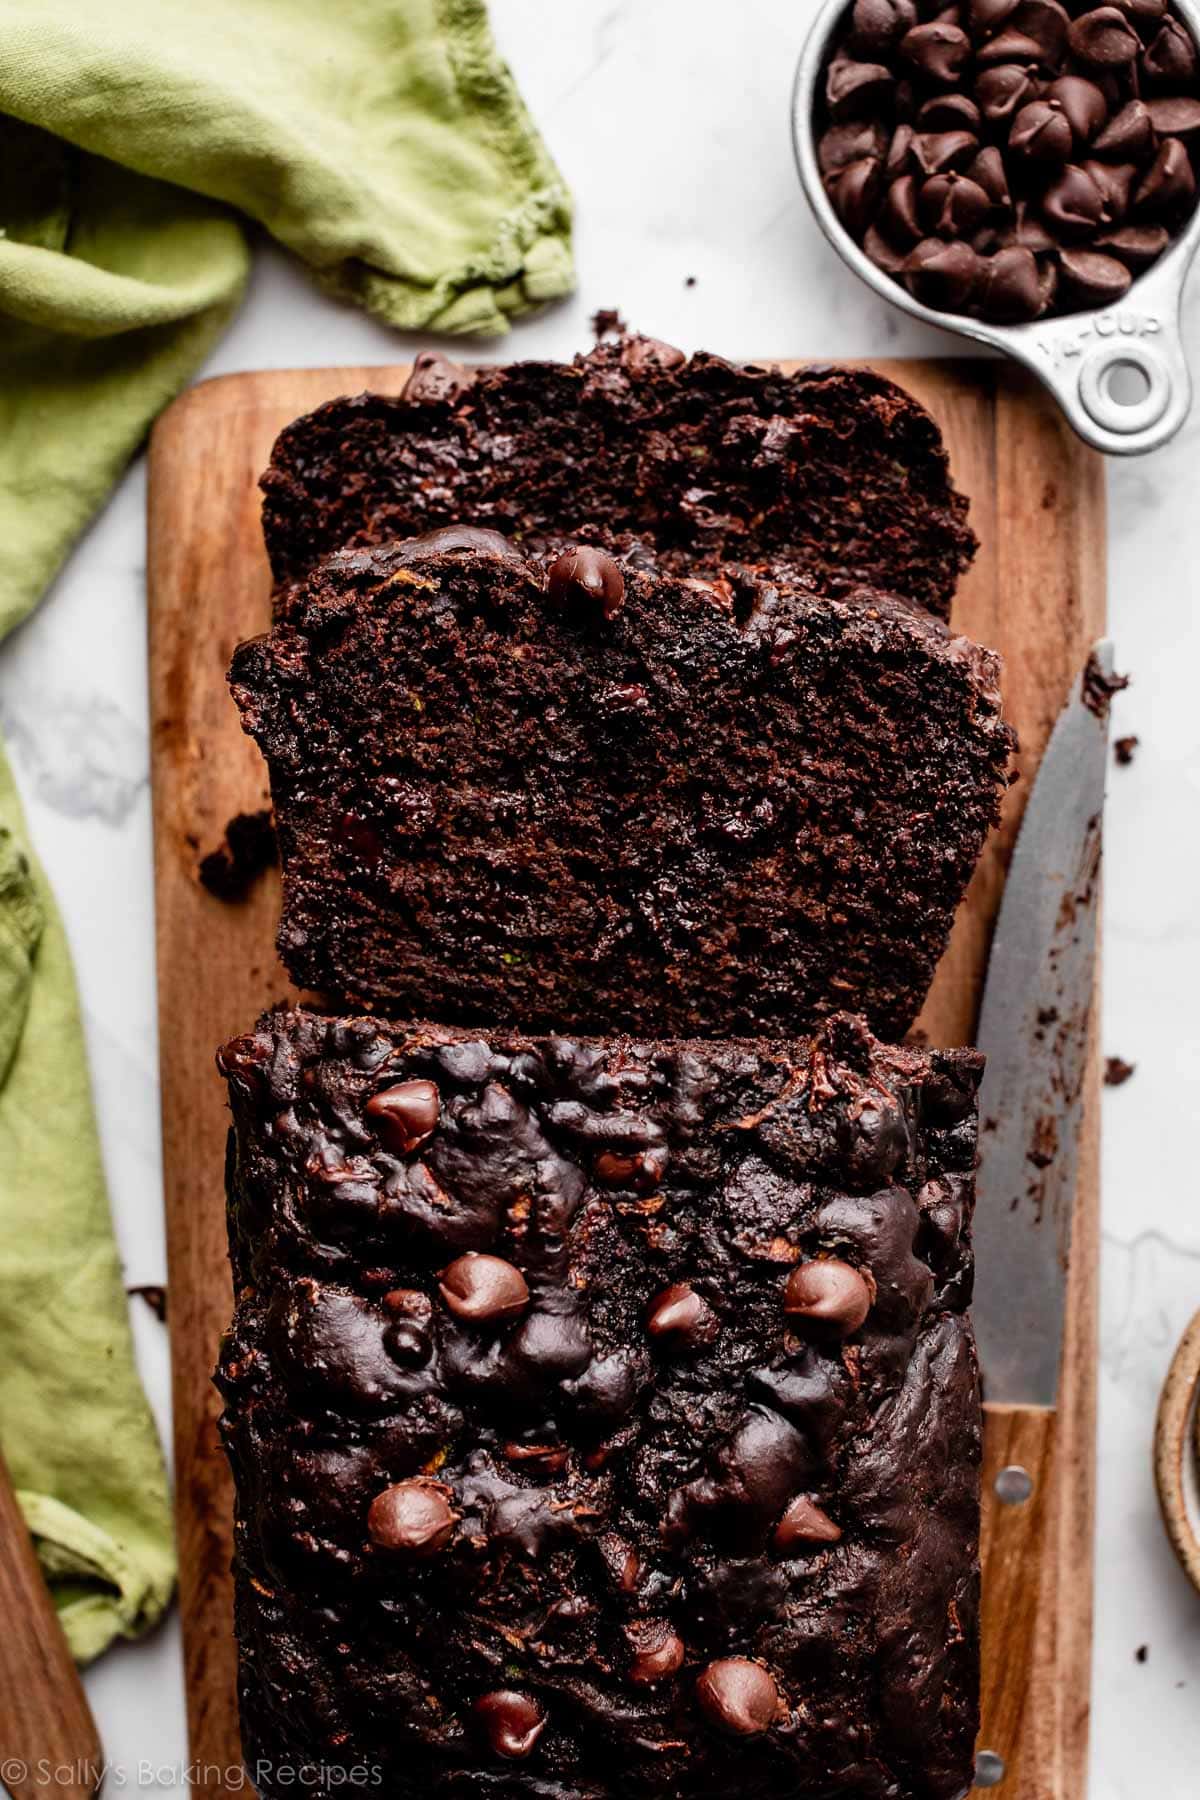
Double Chocolate Zucchini Bread


  • 1 cup (125gall-purpose flour 
  • 1/2 cup (41g) unsweetened natural cocoa powder (not Dutch process)*
  • 3/4 teaspoon baking soda
  • 1/4 teaspoon baking powder
  • 1/4 teaspoon salt
  • 1/2 teaspoon espresso powder*
  • 3/4 cup (135g) semi-sweet chocolate chips*
  • 2 large eggs
  • 1/4 cup (60ml) vegetable oil or melted coconut oil
  • 1/3 cup (80g) plain Greek yogurt or sour cream*
  • 2/3 cup (135ggranulated sugar*
  • 1 teaspoon pure vanilla extract
  • 1 and 1/2 cups (180g) shredded zucchini (no need to blot)*
  1. Preheat oven to 350°F (177°C). Grease a 9×5-inch loaf pan or 8×4-inch loaf pan (for a taller loaf) with nonstick spray. Set aside.
  2.  In a large bowl, whisk the flour, cocoa powder, baking soda, baking powder, salt, and espresso powder together until combined. Mix in the chocolate chips. Set aside.
  3. In a medium bowl, whisk the eggs, oil, yogurt, granulated sugar, and vanilla together until combined. Slowly pour the wet ingredients into the dry ingredients and gently whisk to combine. Fold in the zucchini. The batter is very thick.
  4. Bake for 45–55 minutes, making sure to loosely cover the bread with aluminum foil halfway through to prevent the top from over-cooking. The bread is done when a toothpick inserted in the center comes out clean with only a few small moist crumbs. The 9×5-inch pan takes closer to 45 minutes, and the 8×4-inch pan takes closer to 55 minutes. All ovens vary, so begin checking around the 45-minute mark.
  5. Remove bread from the oven and allow the bread to cool in the pan set on a wire rack for 1 hour. While it’s still warm, I gently press a few more chocolate chips into the top; this is optional and only for looks.
  6. Remove bread from the pan and place the loaf directly on the wire rack to cool completely.
NOTES:
I used mini chocolate chips but otherwise made it as written. Easy and excellent!
Hat tip to the ever-excellent Sally’s Baking Addiction

Monday, July 3, 2023

Patriotic Jello Jigglers

 Ingredients
2 3-ounce boxes strawberry Jello
2 3-ounce boxes berry blue Jello
14 ounce can sweetened condensed milk
4 0.25-ounce envelopes unflavored gelatin (i.e. Knox)
Boiling water

Instructions
  • Spray an 8-inch or 9-inch square baking pan with nonstick cooking spray.
  • In a small bowl, stir together 1 box of the strawberry Jello, ½ an envelope of the Knox gelatin and 1 cup of the boiling water, ensuring everything has dissolved. Pour into the prepared pan and place in the refrigerator to set, about 15 minutes.
  • Meanwhile, in a medium bowl, stir together the sweetened condensed milk and 1 cup boiling water. In a separate small bowl, sprinkle 2 envelopes of the unflavored gelatin over ½ cup cold water. Allow to sit for 5 minutes. Add ½ cup boiling water to the unflavored gelatin mixture and stir to dissolve. Pour into the sweetened condensed milk mixture and stir to combine.
  • Once the red layer is set, pour 1 cup of the milk mixture over the red layer. Place in the refrigerator for at least 15 minutes.
  • Repeat the layers, alternating the red and blue between the white layers, with blue being your last layer. Ensure that the colored Jello mixtures cool to room temperature before pouring over the previous set layer.
  • Once all of the layers have been poured, refrigerate for at least 4 hours. When ready to serve, run a thin knife around the edges of the pan and turn the Jello out onto a cutting board. Cut into squares and serve, refrigerating any leftovers.
NOTES:
  • A 1/2 pack of knox gelatin is about 1.25 teaspoons
  • This goes quicker than it looks.  As soon as one layer goes in the fridge, make the next one, and it's cooled off a bit by the time you add it. (15 minutes or so).
  • I made it my square rubbermaid container (a little bigger than 9"). Photo as a reminder for next time.
  • Having a level shelf in your fridge is helpful.


Thursday, September 8, 2022

Mocha Madness Ice Cream


  • 1 cup (227g) milk, cold, whole preferred
  • 3/4 cup (149g) granulated sugar
  • 2 tablespoons (11g) espresso powder
  • 2 tablespoons (11g) unsweetened cocoa, Dutch-process or natural
  • 2 cups (454g) heavy cream or whipping cream, cold
  • 1 teaspoon Vanilla Extract
  • 8 (113g) chocolate sandwich cookies, broken into small pieces
  1. Whisk or mix together the milk, sugar, espresso powder, and cocoa until the sugar has dissolved. Stir in the heavy cream and vanilla.

  2. Freeze in an ice cream maker according to the manufacturer's directions.

  3. Stir the cookie bits into the soft ice cream and serve immediately. Or freeze for longer storage.

    NOTES:

    less espresso powder would also be good.

Thursday, June 23, 2022

Strawberry Sour Cream Ice Cream


Ingredients

  • 1 lb (450g) strawberries, fresh or frozen (cleaned and hulled if fresh)
  • 3/4 cup (150g) sugar
  • 2 tbsp vodka or kirsch
  • 1 cup (240g) sour cream
  • 1 cup (250ml) heavy cream
  • 1/2 tsp fresh lemon juice
  • 1 tsp vanilla extract

Instructions

  • If you are using frozen berries, place them in a bowl and cover with the sugar and vodka. Let them sit until the sugar mostly dissolves, you’ll want to toss them a few times as they sit. By the time they thaw and the sugar dissolves the fruit will have released much of its juices.
  • For fresh berries, slice them before you toss them with the sugar and vodka.
  • David says to cook the berries and sugar, but I skipped this step because I used frozen berries. If you are using fresh strawberries it is a good idea to break them down a bit by cooking them for a few minutes. if you do, you’ll need to let it cool before proceeding.
  • Place the strawberries in a blender or food processor with the sour cream. Pulse until they are combined and the strawberries are broken up, but not pureed, you want some small chunks left in the mix.
  • Remove from the food processor and whisk in the cream, lemon juice and vanilla. Refrigerate the ice cream mixture for an hour before freezing.
  • Follow your machine’s instructions for freezing the ice cream.
  • It will be frozen, but still soft and not at all grainy, just beyond soft serve.

Delicious and easy.  I used an immersion blender in the kettle and it eliminated some of the mess.

From Zoebakes


Friday, January 21, 2022

Seven Layer Cookies

Easier than they look, and very festive!  

My few notes:

  • Emily has an easy homemade almond paste recipe
  • These would be great tea cakes (especially in theme colors)
  • It's January 21 and I still have some in the freezer (an uncut slab) and they're still perfect.

Recipe and notes from Smitten Kitchen:

I have so many extra hints/notes on these, I’ve moved them to the bottom. Read on!

Makes about 5 dozen cookies (or more, if you cut them as small as I did)

Time: These take at least 11 hours from beginning to end, most of it inactive, but make sure you have a good 2 to 3 hour window

  • 4 large eggs, separated
  • 1 cup (200 grams) granulated sugar
  • 1 (8-ounce or 225-gram) can almond paste
  • 1 1/4 cups (10 ounces, 285 grams, or 2 1/2 sticks) unsalted butter, softened
  • 1 teaspoon (5 ml) almond extract
  • 2 cups (260 grams) all-purpose flour
  • 1/2 teaspoon kosher salt
  • 25 drops red food coloring
  • 25 drops green food coloring
  • 1 (12-ounce or 340-gram) jar apricot preserves, heated and strained
  • 7 ounces (200 grams) bittersweet chocolate (not unsweetened), chopped

Put oven rack in middle position and preheat oven to 350°F. Butter a 13- by 9-inch baking pan and line bottom with wax paper, leaving a 2-inch overhang on 2 ends, then butter paper.

Beat whites in mixer fitted with whisk attachment at medium-high speed until they just hold stiff peaks. Add 1/4 cup sugar a little at a time, beating at high speed until whites hold stiff, slightly glossy peaks. Transfer to another bowl.

Switch to paddle attachment, then beat together almond paste and remaining 3/4 cup sugar until well blended, about 3 minutes. Add butter and beat until pale and fluffy, about 3 minutes. Add yolks and almond extract and beat until combined well, about 2 minutes. Reduce speed to low, then add flour and salt and mix until just combined.

Fold half of egg white mixture into almond mixture to lighten, then fold in remaining whites gently but thoroughly.

Divide batter among 3 bowls. Stir red food coloring into one and green food coloring into another, leaving the third batch plain. Set white batter aside. Chill green batter, covered. Pour red batter into prepared pan and spread evenly with offset spatula (layer will be about 1/4 inch thick).

Bake red layer 8 to 10 minutes, until just set. (It is important to undercook. They’ll look like they’re not done, but a tester does come out clean.)

Using paper overhang, transfer layer to a rack to cool, about 15 minutes. Clean pan, then line with parchment or wax paper and butter paper in same manner as above. Bake white layer in prepared pan until just set. As white layer bakes, bring green batter to room temperature. Transfer white layer to a rack. Prepare pan as above, then bake green layer in same manner as before. Transfer to a rack to cool.

When all layers are cool, invert green onto a parchment or wax-paper-lined large baking sheet. Discard paper from layer and spread with half of preserves. Invert white on top of green layer, discarding paper. Spread with remaining preserves. Invert red layer on top of white layer and discard wax or parchment paper.

Cover with plastic wrap and weight with a large baking pan. Chill at least 8 hours.

Remove weight and plastic wrap. Bring layers to room temperature. Melt chocolate in a double boiler or a metal bowl set over a saucepan of barely simmering water, stirring until smooth. Remove from heat. Keep chocolate over water. (Alternately, you can do what I did: melt the chocolate 3.5 ounces at a time just to make sure it doesn’t seize up between steps, though that shouldn’t be a problem if you only let it set for 15.)

Trim edges of assembled layers with a long serrated knife. Quickly spread half of chocolate in a thin layer on top of cake. Chill, uncovered, until chocolate is firm, about 15 minutes. Cover with another sheet of wax paper and place another baking sheet on top, then invert cake onto sheet and remove paper. Quickly spread with remaining chocolate. Chill until firm, about 30 minutes.

Cut lengthwise into 4 strips (I cut them into more, because I wanted them 1 to 1 1/2 inches wide, as I remember them). Cut strips crosswise into 3/4-inch-wide cookies.

Do ahead: Cookies keep, layered between sheets of wax paper or parchment, in an airtight container at room temperature 2 weeks. They’ll keep even longer in the freezer.

Three important notes:

I struggled with three things in this recipe (the first two were mistakes, and both came back to bite me in the tuchus) so you won’t have to:

1. Don’t stack cooled cakes: Once my first two cake layers were cool (and still on their parchment liners) and I needed to make room on the cooling rack for the third one, I went ahead and stacked them, their liners between them. DON’T DO THIS. Not because they crush each other (they won’t) or because they’ll stick (they don’t) but because that paper liner is greased on both sides from baking and the chocolate shell never quite stuck right to the pink cake because of the grease accidentally left on it. I can’t tell you how many cookies were rejected because their chocolate fell off. It is too sad to discuss.

2. Be careful dividing your jam: I mindlessly divided the jam wrong/unevenly and ended up with too much between one layer and too little between another. Too little was no biggie, but where there was too much it oozed out and was particularly difficult to keep stacked when sawing through with a serrated knife. So, if you’re using a scale to make two six-ounce divisions of jam, remember that you’ve probably strained out a good ounce or so of jam solids, or in other words DUH. Your divided amounts will be less than six ounces each.

3. They’re easier to cut when frozen: Nevertheless, they tasted amazingly and I was all ready to do a victory lap around my wee kitchen counter, however, when I got to cutting them up and then it all went south. People, these were trying to cut. The problem lies within the differing textures of the layers — the top hard chocolate shell more benefits from a sharp serrated knife (a regular, even very sharp knife will crack the edges when you press down on it), the same serrated knife that gets gummed with jam and tries to pull the soft cake layers in between apart. It was exasperating. It didn’t go well. I packed up some for a party and stuffed the rest in the freezer, only to discover the next day that these cut fantastically when frozen. Seriously. Trust me. I have the gummy floor and gray hairs to prove it.

Saturday, August 15, 2020

Italian Lemon Ricotta Cake

NOTE: next time try this one with more leavening. https://www.themediterraneandish.com/lemon-ricotta-cake/#wprm-recipe-container-87544

So if I were an annoying recipe blogger I'd start with a too-long story about buying huge tubs of ricotta for practically nothing at Sam's or Costco, but then what to do with all the leftovers?  Anyway, make this cake.

¾ cup butter, softened 1 ½ sticks

1 ½ cups sugar

15 ounces whole milk ricotta cheese

3 large eggs

1 teaspoon vanilla

1 large lemon, zested and juiced

½ teaspoon baking soda

½ teaspoon salt

1 ½ cups flour

powdered sugar for dusting top of cake (optional)

Instructions

Preheat oven to 350 degrees. Grease a 9 inch springform pan using butter and powdered sugar; set aside.

In a large mixing bowl or stand mixer, cream together the butter and sugar until combined. Add in the ricotta cheese and blend until light and fluffy, about 4 to 5 minutes.

Mix in the eggs, one at a time. Add in the vanilla, lemon zest, and lemon juice and mix to combine. In the same bowl, stir in the baking soda and salt. Lastly, add in the flour and mix until just combined, scraping down the sides of bowl to full incorporate all of the ingredients.

Pour the batter into the prepared springform pan. Bake for 45-55 minutes, or until the cake is set and a toothpick inserted in the middle of the cake comes out clean.

Let cool in pan for 15 minutes before removing the collar and base of the pan. Cool on a wire rack and dust with powdered sugar before serving.

NOTES:

  • This cake is recommended for brunch or even breakfast and we agree it would be delicious.  It's denser, like a pound cake and not too sweet.  It would be pretty excellent with fruit on top,
  • I didn't have a lemon (alas, no zest) but I did add 4 Tbsp of lemon juice and about a teaspoon of lemon extract.
  • I also put a little lemon glaze on top (juice and powdered sugar).  It was good.
  • AND, we didn't have it in the oven long enough and ended up throwing out all the center part.  The edges were excellent though and I'll definitely make it again.
  • It would probably be amazing as a layer cake with lemon curd spread in the middle.

Sunday, April 12, 2020

Lamb Cake


Notes for the lamb mold:
  • I just used a cake mix and Wilton buttercream recipe and all worked well.  I haven't made this for quite a while and thought I might need something denser like a pound cake.  My Aldi cake mix was stable enough to stand up and come out of the mold well. (I used the baking spray with flour in it.)
  • To hold it together while baking I inverted a Dutch oven with the edge over the middle as a weight.
  • One cake mix made this and 3-5 cupcakes.
  • Icing recipe (It used almost a whole batch.)
UPDATE -Ignore the baking directions on the box and bake this for 60-70 minutes. You should be able to lift off the top and test doneness with a toothpick.


Sunday, March 29, 2020

Cinnamon Roll Cake - GF

 Prep Time - 10 minutes
 Cook Time - 35 minutes
 Total Time - 45 minutes

Ingredients
Cake:

  • 3 cups *gluten-free flour I like Pillsbury gluten-free. Not all gluten-free flours are created equal. You may experience different baking results depending on the gluten-free flour blend you choose.
  • 1 1/2 teaspoons xanthan gum leave out if your flour already contains it.
  • 1/4 teaspoon salt
  • 1 cup sugar
  • 4 teaspoons baking powder
  • 1 1/2 cups milk
  • 2 eggs
  • 2 teaspoons pure vanilla extract
  • 1/2 cup unsalted butter melted 

Topping:

  • 1 cup unsalted butter softened  (pretty sure I could have used less - maybe 3/4 cup?)
  • 1 cup packed brown sugar
  • 2 tablespoons gluten-free flour
  • 1 tablespoon cinnamon

Glaze:

  • 1.5 cups powdered sugar
  • 2 tablespoons milk (possibly add a little more to get the right consistency)
  • 1 teaspoon vanilla

Instructions
Cake:

  • Preheat oven to 350° F.
  • Spray a 9×13 glass baking pan with cooking spray.
  • In a large bowl add the gluten-free flour, xanthan gum (leave out if your flour already has it), salt, sugar, baking powder, milk, eggs, and vanilla and mix until fully combined.
  • Once combined stir in the melted butter.
  • The cake batter will be very thick and sticky. Pour into the prepared 9×13 baking pan.

Topping:

  • In a large bowl, cream butter, brown sugar, gluten-free flour and cinnamon together with a mixer.
  • Drop heaping tablespoonfuls of the butter mixture into the cake batter.
  • Use a knife to swirl the butter mixture through the cake.
  • Bake at 350 degrees for 35-40 minutes. Use a toothpick to check and see if the center is done.

Glaze:

  • In a medium bowl, whisk the powdered sugar, milk and pure vanilla extract together.
  • Pour over the warm cake.
  • Enjoy!

MY NOTES:
  • This is a crazy amount of butter!  Try less in the topping next time.  
  • It wasn't quite baked through to the middle after 45 minutes.  Possibly because of all that butter I dumped on top. ;-)
  • It was a good Sunday brunch option and is equally good cold.

The best way to measure gluten-free flour is the “spoon & level” method. Using a spoon, scoop the flour into the measuring cup.  After you’ve spooned the flour into the measuring cup, use the back of a knife to level off the top of the measuring cup. Friends, please do not scoop the flour out of the bag with your measuring cup.

Original Recipe Here

Wednesday, March 25, 2020

GF Angel Food Cake

This mix from Aldi gets two thumbs up, even from the pro-gluten crowd!
It does require a dozen egg whites, so the texture is right on.


Sunday, October 27, 2019

Almond flour crust

  • 2 cups (192g) almond flour
  • 6 tablespoons (74g) sugar
  • 3 tablespoons (21g) cornstarch
  • 1/4 teaspoon salt
  • 6 tablespoons (85g) cold butter, diced
  1. Preheat the oven to 350°F. Lightly grease an 8" square pan or 9" round pan.
  2. To make the crust: Combine the dry ingredients in a small bowl, whisking to blend. Add the cold butter, working it in with your fingers or a pastry blender until the mixture is evenly combined and crumbly.
  3. Dump the mixture into the prepared pan, shake to distribute, and press the crust into the bottom and about 1/2" up the sides of the pan.
  4. Bake the crust until it's light golden brown, about 8 to 10 minutes.
    This recipe was part of the King Arthur gluten free lemon bars. I didn’t use it for that, but it worked great with this pumpkin cheesecake.


    1 (15-ounce) can unsweetened pumpkin puree

    ½ teaspoon salt 

    15 
     broken into 1-inch pieces

    ¼ cup (1 3/4 ounces) plus 1 1/3 cups (9 1/3 ounces) sugar 

    1 teaspoon ground ginger 

    8 tablespoons butter, melted

    1 pound cream cheese, softened

    1 tablespoon lemon juice 

    teaspoons 

    4 large eggs, room temperature
    1

    INSTRUCTIONS

    Combine pumpkinpumpkin pie spice, and salt in small saucepan. Cook mixture, stirring constantly, over medium heat until reduced to 1 1/2 cups, 6 to 8 minutes; let cool for 1 hour.
    2
    Adjust oven rack to middle position and heat oven to 325 degrees. Make foil sling for 13 by 9-inch baking pan. Grease aluminum foil.
    3
    Process graham crackers, 1/4 cup sugar, and ginger in food processor to fine crumbs, about 15 seconds. Add butter and pulse until combined, about 5 pulses. Sprinkle mixture into prepared pan and press into even layer. Bake until just starting to brown, 15 to 18 minutes. Let crust cool completely on wire rack.
    4
    Using stand mixer fitted with paddle, beat cream cheese and remaining 1 1/3 cups sugar on medium-low speed until smooth, about 2 minutes. Add lemon juice, vanilla, and pumpkin mixture and beat until combined. Increase speed to medium; add eggs, one at a time; and beat until incorporated. Pour over cooled crust and spread into even layer. Bake until edges are slightly puffed and center is just set, 45 to 50 minutes. Let cheesecake cool in pan on wire rack for 2 hours. Cover pan with plastic wrap and refrigerate cheesecake for at least 3 hours or up to 24 hours. Using foil overhang, lift cheesecake out of pan. Cut into 24 pieces before serving.