Showing posts with label Category - Christmas. Show all posts

Tuesday, October 28, 2025

Everyone’s Favorite Fruitcake -KAF


Saturday, November 23, 2024

Irish cream

 It’s always worth re-reading Deb’s background and process, but I’m still archiving the recipe here because I make it every year. 


  • To add a faint coffee flavor: Mix 1 teaspoon instant espresso or coffee powder with the cocoa and then continue as written above, whisking the cream slowly into it. I did not do this; I felt the flavor was much more authentic without it. 
  • To make less sweet: Add more cream and more whiskey, 1 tablespoon of each at a time.
  • To make less boozy: Add more cream and condensed milk, 1 tablespoon of each at a time.
  • To make more boozy: You’ve got this.
  • 1 teaspoon unsweetened cocoa powder
  • 1 cup (235 ml) heavy or whipping cream
  • 1 (14-ounce or 415 ml) can sweetened condensed milk
  • 1/2 teaspoon vanilla extract
  • 1 cup (235 ml) Irish whiskey (I used Jameson)
  • In the bottom of a pitcher, whisk cocoa powder and a spoonful of cream into a paste. Slowly, whisking the whole time, add more cream a spoonful at a time until the paste is smooth and loose enough that you can whisk the rest of the cream in larger splashes. Once all of the cream is in, whisk in condensed milk, whiskey and vanilla. Cover with lid or plastic wrap and keep in fridge for up to two weeks, possibly longer.
  • Serve in a tiny tumbler filled with ice, or splashed into coffee.
  • https://smittenkitchen.com/2016/12/homemade-irish-cream/
  • Saturday, September 14, 2024

    Tourtiere

    4 pounds ground pork butts 

    1 ½ cups water 

    1 medium onion, ground or finely chopped 

    2 tsp salt 

    1 to 2 tsp cinnamon, start low and adjust to taste 

    1 to 1.5 tsp cloves, start low and adjust to taste 

    1 cup bread crumbs 

    Your favorite pie crust 

    Put meat in large pot.  Break it up and add water. Mix in onions and salt. Adjust heat to keep meat cooking at a low boil; stir at intervals to keep from scorching.  Add more water if necessary. Cook with cover on for about 45 minutes, adding the spices halfway through. 

    Near the end of cooking time, add the bread crumbs.  Adjust the amount of crumbs according to the amount of fat.  The mixture shouldn’t become too dry. 

    This amount makes filling for 2 large pies or 9-11 small ones.   Fill uncooked pie crusts.  Top with either a second crust or mashed potatoes. May freeze at this point. 

    Bake at 350° for 45 minutes 

    Note: this is Grant’s great-great grandmother’s recipe 

    Friday, January 21, 2022

    Seven Layer Cookies

    Easier than they look, and very festive!  

    My few notes:

    • Emily has an easy homemade almond paste recipe
    • These would be great tea cakes (especially in theme colors)
    • It's January 21 and I still have some in the freezer (an uncut slab) and they're still perfect.

    Recipe and notes from Smitten Kitchen:

    I have so many extra hints/notes on these, I’ve moved them to the bottom. Read on!

    Makes about 5 dozen cookies (or more, if you cut them as small as I did)

    Time: These take at least 11 hours from beginning to end, most of it inactive, but make sure you have a good 2 to 3 hour window

    • 4 large eggs, separated
    • 1 cup (200 grams) granulated sugar
    • 1 (8-ounce or 225-gram) can almond paste
    • 1 1/4 cups (10 ounces, 285 grams, or 2 1/2 sticks) unsalted butter, softened
    • 1 teaspoon (5 ml) almond extract
    • 2 cups (260 grams) all-purpose flour
    • 1/2 teaspoon kosher salt
    • 25 drops red food coloring
    • 25 drops green food coloring
    • 1 (12-ounce or 340-gram) jar apricot preserves, heated and strained
    • 7 ounces (200 grams) bittersweet chocolate (not unsweetened), chopped

    Put oven rack in middle position and preheat oven to 350°F. Butter a 13- by 9-inch baking pan and line bottom with wax paper, leaving a 2-inch overhang on 2 ends, then butter paper.

    Beat whites in mixer fitted with whisk attachment at medium-high speed until they just hold stiff peaks. Add 1/4 cup sugar a little at a time, beating at high speed until whites hold stiff, slightly glossy peaks. Transfer to another bowl.

    Switch to paddle attachment, then beat together almond paste and remaining 3/4 cup sugar until well blended, about 3 minutes. Add butter and beat until pale and fluffy, about 3 minutes. Add yolks and almond extract and beat until combined well, about 2 minutes. Reduce speed to low, then add flour and salt and mix until just combined.

    Fold half of egg white mixture into almond mixture to lighten, then fold in remaining whites gently but thoroughly.

    Divide batter among 3 bowls. Stir red food coloring into one and green food coloring into another, leaving the third batch plain. Set white batter aside. Chill green batter, covered. Pour red batter into prepared pan and spread evenly with offset spatula (layer will be about 1/4 inch thick).

    Bake red layer 8 to 10 minutes, until just set. (It is important to undercook. They’ll look like they’re not done, but a tester does come out clean.)

    Using paper overhang, transfer layer to a rack to cool, about 15 minutes. Clean pan, then line with parchment or wax paper and butter paper in same manner as above. Bake white layer in prepared pan until just set. As white layer bakes, bring green batter to room temperature. Transfer white layer to a rack. Prepare pan as above, then bake green layer in same manner as before. Transfer to a rack to cool.

    When all layers are cool, invert green onto a parchment or wax-paper-lined large baking sheet. Discard paper from layer and spread with half of preserves. Invert white on top of green layer, discarding paper. Spread with remaining preserves. Invert red layer on top of white layer and discard wax or parchment paper.

    Cover with plastic wrap and weight with a large baking pan. Chill at least 8 hours.

    Remove weight and plastic wrap. Bring layers to room temperature. Melt chocolate in a double boiler or a metal bowl set over a saucepan of barely simmering water, stirring until smooth. Remove from heat. Keep chocolate over water. (Alternately, you can do what I did: melt the chocolate 3.5 ounces at a time just to make sure it doesn’t seize up between steps, though that shouldn’t be a problem if you only let it set for 15.)

    Trim edges of assembled layers with a long serrated knife. Quickly spread half of chocolate in a thin layer on top of cake. Chill, uncovered, until chocolate is firm, about 15 minutes. Cover with another sheet of wax paper and place another baking sheet on top, then invert cake onto sheet and remove paper. Quickly spread with remaining chocolate. Chill until firm, about 30 minutes.

    Cut lengthwise into 4 strips (I cut them into more, because I wanted them 1 to 1 1/2 inches wide, as I remember them). Cut strips crosswise into 3/4-inch-wide cookies.

    Do ahead: Cookies keep, layered between sheets of wax paper or parchment, in an airtight container at room temperature 2 weeks. They’ll keep even longer in the freezer.

    Three important notes:

    I struggled with three things in this recipe (the first two were mistakes, and both came back to bite me in the tuchus) so you won’t have to:

    1. Don’t stack cooled cakes: Once my first two cake layers were cool (and still on their parchment liners) and I needed to make room on the cooling rack for the third one, I went ahead and stacked them, their liners between them. DON’T DO THIS. Not because they crush each other (they won’t) or because they’ll stick (they don’t) but because that paper liner is greased on both sides from baking and the chocolate shell never quite stuck right to the pink cake because of the grease accidentally left on it. I can’t tell you how many cookies were rejected because their chocolate fell off. It is too sad to discuss.

    2. Be careful dividing your jam: I mindlessly divided the jam wrong/unevenly and ended up with too much between one layer and too little between another. Too little was no biggie, but where there was too much it oozed out and was particularly difficult to keep stacked when sawing through with a serrated knife. So, if you’re using a scale to make two six-ounce divisions of jam, remember that you’ve probably strained out a good ounce or so of jam solids, or in other words DUH. Your divided amounts will be less than six ounces each.

    3. They’re easier to cut when frozen: Nevertheless, they tasted amazingly and I was all ready to do a victory lap around my wee kitchen counter, however, when I got to cutting them up and then it all went south. People, these were trying to cut. The problem lies within the differing textures of the layers — the top hard chocolate shell more benefits from a sharp serrated knife (a regular, even very sharp knife will crack the edges when you press down on it), the same serrated knife that gets gummed with jam and tries to pull the soft cake layers in between apart. It was exasperating. It didn’t go well. I packed up some for a party and stuffed the rest in the freezer, only to discover the next day that these cut fantastically when frozen. Seriously. Trust me. I have the gummy floor and gray hairs to prove it.

    Friday, December 10, 2021

    Rosemary Thyme Spiced Nuts


    INGREDIENTS
    3 c. large whole nuts - I like to use 1 c. cashews, 1 c. pecans, and 1 c. almonds (I usually buy nuts at Trader Joe's)
    2 T. olive oil
    2 T. coarsely chopped fresh rosemary leaves
    1 tsp. fresh thyme leaves
    1 tsp. cumin
    1/4 tsp. cayenne pepper
    1 T. sugar
    1 tsp. kosher salt
    1/2 tsp. freshly ground black pepper


    INSTRUCTIONS
    Preheat oven to 300° F. Place nuts in a medium heatproof bowl.

    Pour oil into a small heavy saucepan and place over medium-low heat until warm. Do not let it get too hot – the oil will burn. Add rosemary and thyme and stir until aromatic, about 1 minute. Remove pan from heat and stir in cumin and cayenne pepper. Pour the flavored oil over the nuts and stir to coat evenly. Sprinkle with sugar, salt, and black pepper. Stir again. Transfer to a jelly roll pan or a baking pan with sides. Bake for about 15 minutes total, stirring after the first 10 minutes. Let cool. Store in an airtight container for up to two weeks.

    JEN'S NOTES:
    • Very tasty and simple! A nice break from all the sweet snacks this time of year.
    • I made a double batch and divided them into little mason jars as St. Nicholas day gifts for co-workers.
    • I used half oven-roasted, salted almonds and half unsalted, chopped pecans, which was a good mix for flavor and texture.
    • I didn't have fresh herbs, so I used dried rosemary and thyme, and changed the proportions accordingly.
    • I added a little garlic powder because, you know, garlic.

    Monday, January 18, 2021

    Pickle dip

     It would be easy to make a half batch, but why would you?

    16 ounces cream cheese, softened

    9 ounces Buddig corned beef*, chopped (store brand is fine)

    16 ounces baby dill pickles

    Chop the pickles and meat, mix it all together and let the flavors blend in the fridge for at least a few hours before you gobble it all up.

    Serve with crackers.

    * Most recipes call for dried beef, and that is good, but I always have trouble finding it and the corned beef is also good and probably cheaper anyway.

    Star Bread

    UPDATE: This would be a really great choice for breakfast on Epiphany. #liturgicalliving

    Lots of drama, but easy to make with a brunch-friendly shortcut version requiring only 20 minutes for the 2nd rise. 

    My orange bread version before icing

    2 teaspoons instant or active dry yeast*

    3 Tablespoons granulated sugar

    3/4 cup (180ml) whole milk

    1/4 cup (60g) unsalted butter, softened to room temperature

    1 large egg

    2 and 1/3 cups (290g) all-purpose flour (spoon & leveled), plus more as needed

    1 teaspoon salt

    filling (see recipe note)

    egg wash: 1 large egg beaten with 1 Tablespoon (15ml) milk

    2 Tablespoons confectioners’ sugar

    Make the dough: 

    • Place the yeast and sugar in the bowl of a stand mixer fitted with a dough hook or paddle attachment. Or, if you do not own a stand mixer, a regular large mixing bowl. Heat the milk on the stove or in the microwave until warm to touch, about 110°F (43°C). Pour warm milk on top of yeast/sugar. Whisk gently to combine, then loosely cover with a clean kitchen towel and allow to sit for 5-10 minutes. The mixture will be frothy after 5-10 minutes. 
    • If you do not have a mixer, you can mix by hand in this step. Add the butter, egg, flour, and salt. Beat on low speed for 3 minutes. Dough will be soft. Using lightly floured hands, form it into a ball. If the dough is too sticky to handle, add 1-3 more Tablespoons of flour, but you want a very soft dough.
    • Place the dough in a greased bowl (nonstick spray is fine) and cover with plastic wrap or aluminum foil. Place in a slightly warm environment to rise until doubled in size, around 60-90 minutes. For this warm spot, I suggest using the oven. Preheat to 150°F, then turn the oven off after preheating. Place the covered bowl inside and shut the oven door. This is your warm environment.

    Prepare filling: 

    • Line a large baking sheet with parchment paper or a silicone baking mat and prepare your star bread filling. See all my options in the recipe notes below.

    Assemble the bread: 

    • Watch the video above to guide you through this step. Punch down the dough to release the air. Place dough on a lightly floured work surface. Divide into 4 equal pieces and, with a floured rolling pin, roll each out into a thin 10-inch circle. Place the bottom circle on prepared baking sheet. If it lost its circle shape, use your hands to form the edges back into a round shape. Top with filling, then layer the remaining circles and filling on top. The top layer does not have filling on it, so only 3 of the 4 circles will be topped with filling. 
    • Using a sharp knife or pizza cutter, cut any scraps around the edges so you have an even circle. Place a 3 inch round object or bowl in the center and make an indent. This is the center of the star. Now it’s time to cut strips from the edge to the center 3-inch circle. Using a pizza cutter, cut 16 even strips. 
    • Using both hands, grab two strips and twist them away from each other twice, then press the two ends together to make a point. Your star bread will have 8 points.

    Cover the shaped bread with plastic wrap or aluminum foil and let it rest for 20 minutes.

    Preheat oven to 350°F (177°C).

    Bake the bread: 

    • Using a pastry brush, lightly brush the star bread with egg wash. This ensures a beautifully shiny golden brown bread. Bake for about 25- 30 minutes or until golden brown on top. If you notice the top or points browning too quickly, loosely tent the star bread with aluminum foil. Remove from the oven and cool for 5 minutes.
    • Dust confectioners’ sugar on top and enjoy warm. Cover and store leftover star bread at room temperature for 1-2 days or in the refrigerator for 4-5 days.

    Make Ahead Instructions: 

    • Refrigerate dough for up to 1-2 days or freeze up to 3 months. Prepare bread dough through step 3 below. After it has risen, punch the dough down to release the air bubbles. Cover the dough tightly, then place it in the refrigerator for up to 2 days or in the freezer for up to 3 months. When ready, thaw the bread overnight in the refrigerator. (If frozen.) Remove the dough from the refrigerator and let it sit on the counter, uncovered, for 20 minutes. Punch the dough down again to release any air bubbles. Then, continue with step 5. I do not recommend shaping the star bread and refrigerating overnight. Letting the shaped bread sit in the refrigerator overnight risks over-rising and losing its shape.

    FILLINGS:

    • Cinnamon Sugar: Spread 1 Tablespoon of very soft unsalted butter onto each of the 3 circles. (3 Tbsp total.) Mix 1/4 cup (50g) granulated sugar with 1/2 teaspoon ground cinnamon. This is the total amount and you will divide it between each circle. Sprinkle evenly over butter on each circle.
    • Nutella: Spread 1 heaping Tablespoon of Nutella onto each of the 3 circles. Nutella is difficult to spread onto soft dough, so warm it up in the microwave for a few seconds until it’s a spreadable consistency.
    • Your favorite jam: Spread 1 Tablespoon of jam onto each of the 3 circles.
    • Butter, Brown Sugar, + Ginger: Spread 1 Tablespoon of very soft unsalted butter onto each of the 3 circles. Mix 3 Tablespoons packed light or dark brown sugar with 1/2 teaspoon ground cinnamon and 1 Tablespoon finely chopped crystallized ginger. Sprinkle evenly over butter on each circle.
    • Apple Butter or Pumpkin Butter: Spread 1 heaping Tablespoon onto each of the 3 circles.
    • Chai Spice: Spread 1 Tablespoon of very soft unsalted butter onto each of the 3 circles. Mix 3 Tablespoons granulated sugar with 1/4 teaspoon each ground cinnamon, ground ginger,  ground cardamom, and ground allspice. Sprinkle evenly over butter on each circle.
    • Butter + Cinnamon Sugar + Walnuts + Dates: Spread 1 Tablespoon of very soft unsalted butter onto each of the 3 circles. Mix 3 Tablespoons packed brown or granulated sugar with 1/4 teaspoon ground cinnamon, and 2 Tablespoons each finely chopped walnuts and pitted dates. Sprinkle evenly over butter on each circle.
    • Cinnamon sugar + Orange Zest + Fresh or Dried Cranberries: Spread 1 Tablespoon of very soft unsalted butter onto each of the 3 circles. Mix 3 Tablespoons packed brown or granulated sugar with 1/4 teaspoon ground cinnamon, 2 teaspoons orange zest, and 3 Tablespoons finely chopped fresh or dried cranberries. Sprinkle evenly over butter on each circle.

    NOTES:
    A little bigger than expected - I didn't have a round platter it fit on, so my photo is on a grungy pizza pan. :-/
    Thanks to Sally's Baking Addiction, where you'll find helpful photos and a video version.

    Apple Cider Caramels

     aka: the best thing I made this Christmas


    2 cups (454g) heavy cream

    1 cup (312g) light corn syrup

    2 cups (397g) granulated sugar

    6 tablespoons (85g) butter, salted or unsalted

    1/2 cup (170g) boiled cider

    1/2 teaspoon salt

    1 teaspoon Apple Pie Spice*

    *No Apple Pie Spice? Substitute 1/2 teaspoon cinnamon, 1/4 teaspoon ginger, and 1/4 teaspoon nutmeg or allspice

    Instructions

    • Lightly grease an 8" x 8" baking pan and line with parchment paper, leaving an overhang on opposite sides.
    • Combine the cream, corn syrup, sugar, butter, and boiled cider in a 4-quart, heavy-bottom, deep saucepan. Bring the mixture to a boil over high heat, stirring to dissolve the sugar. Reduce to medium-high heat and cook, without stirring, until the mixture reaches 248°F on a candy thermometer, 20 to 30 minutes, depending on your particular stove. 
    • Remove the pan from the heat; stir in the salt and spice.
    • Pour the hot mixture into the prepared pan. Let it stand for 12 to 18 hours at room temperature before cutting into 1" squares.
    NOTES:

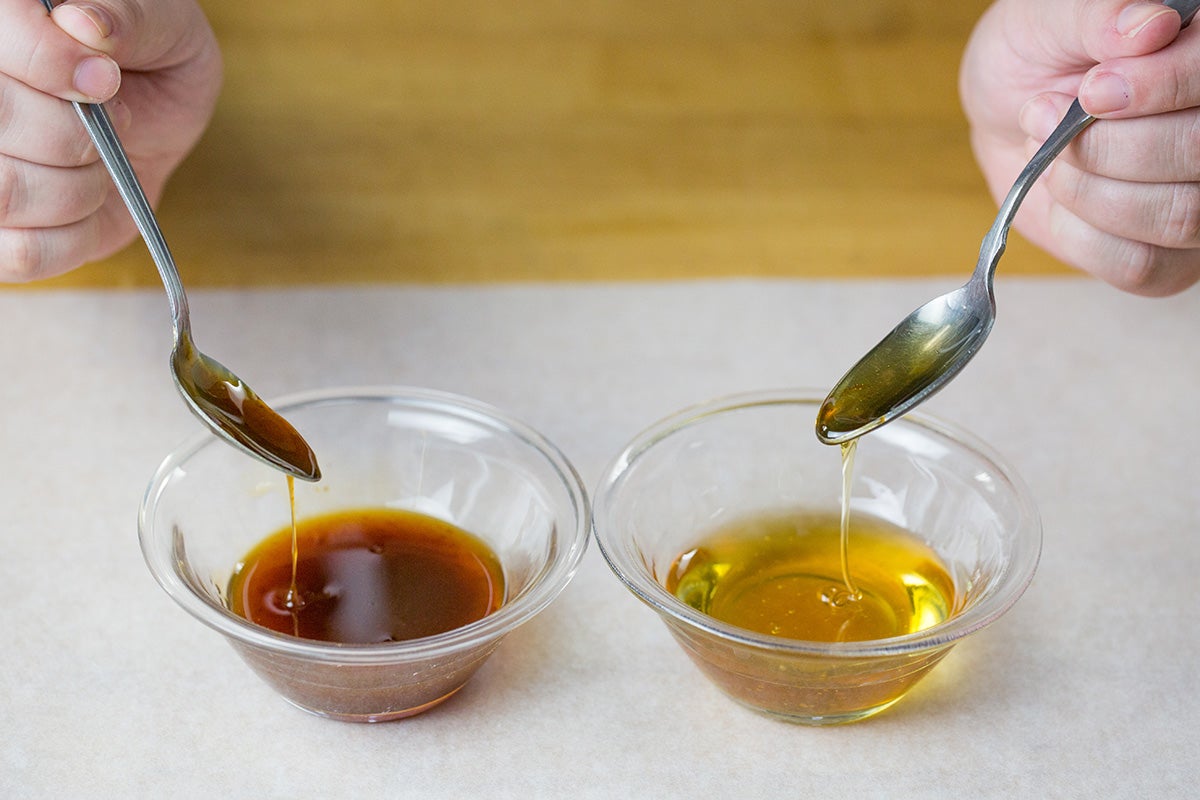
    Boiled Cider

     How to make homemade boiled cider

    SHORT VERSION: 

    • A gallon of fresh cider will reduce down to about 2 cups. Since the cider takes up to 6 hours to boil down, I'd recommend starting with at least a gallon to make it more worth your time. 
    • Select a large, sturdy pot designed for long-term stovetop cooking, such as a cast iron pot or Dutch oven. For a gallon of cider, I use a pot that holds at least 5 quarts. 
    • Bring the cider to a boil over medium heat. Once boiling, turn the heat to low and let it simmer for 5 to 6 hours, giving a couple of quick stirs twice every hour. Starting around hour five, stir more frequently — every 15 minutes or so. 
    • Note that cook time will vary depending on your stove and which pot you choose. In testing, the boiled cider I made in a metal pot took five hours; in a cast iron pot, six.

    DETAILED VERSION (Thanks for all the photos, King Arthur!)

    Why make homemade boiled cider?

    these life-changing caramels


    Sunday, December 30, 2018

    Creamy Herbed Potatoes

    4 To 5 Whole Russet Potatoes
    1 stick Butter
    1 whole Medium Onion, Finely Diced
    8 ounces, weight Cream Cheese
    3/4 cups Heavy Cream
    1 cup Whole Milk (Half-and-Half Works, Too)
    1 teaspoon Finely Chopped Rosemary
    1 teaspoon Finely Chopped Parsley
    1 teaspoon Finely Chopped Chives
    1/2 teaspoon Finely Chopped Sage

    • Preheat oven to 350 degrees.
    • Slice potatoes very thinly.
    • Add butter to a large skillet over medium low heat. When melted, add diced onion. Cook for 3 minutes, stirring occasionally. 
    • Add cream cheese to the pan and stir to melt. Pour in cream and milk, stirring to combine.
    • Season with plenty of salt and pepper, then add chopped herbs.
    • Place potatoes in a buttered baking dish. Pour contents of skillet over the top. Top with Parmesan cheese and bake for 45 minutes, or until bubbly. 
    • Allow potatoes to sit 15 minutes before serving.
    NOTES:
    • We used shredded potatoes instead of sliced.  Recommended!  (2+ containers of the Costco dehydrated ones, but a big package of frozen would work too)
    • Polnaszek-recommended and delicious!  We had them with ham for Christmas.
    • We skipped the parmesan for Jonah, and was fine without
    SOURCE - Pioneer Woman

    Dark Chocolate Buttercrunch

    1 cup (16 tablespoons) unsalted butter
    1/2 teaspoon salt
    1 1/2 cups sugar
    1 teaspoon espresso powder, optional; for enhanced flavor
    3 tablespoons water
    1 tablespoon light corn syrup
    1 teaspoon baking soda, optional (see "tips," below)
    2 cups diced pecans or slivered almonds, toasted
    2 2/3 cups semisweet or bittersweet chocolate, finely chopped; or chocolate chips

    INSTRUCTIONS

    • In a large, deep saucepan, melt the butter. Stir in the salt, sugar, espresso powder, water, and corn syrup, and bring the mixture to a boil. Boil gently over medium heat, without stirring, until the mixture reaches hard-crack stage (300°F on an instant-read or candy thermometer). The syrup will bubble without seeming to change much for awhile, but be patient; all of a sudden it will darken, and at that point you need to take its temperature and see if it's ready. (If you don't have a thermometer, test a dollop in ice water; it should immediately harden to a brittleness sufficient that you'll be able to snap it in two, without any bending or softness). This whole process should take about 10 to 12 minutes. Pay attention; too long on the heat, and the syrup will burn.
    • While the sugar mixture is gently bubbling, spread half of the nuts, in a fairly closely packed, even single layer, on a lightly greased baking sheet (a half sheet pan works well here). If you're unfamiliar with making buttercrunch, it may be easier to use a 9" x 13" pan lined with greased foil or parchment. Top the nuts in the pan with half the chocolate.
    • When the syrup is ready, stir in 1 teaspoon baking soda; it'll foam up, so be careful. Pour the syrup quickly and evenly over the nuts and chocolate. Immediately top with the remaining chocolate, then the remaining nuts.
    • Wait several minutes, then gently, using the back of a spatula, press down on the chocolate-nut layer to spread the chocolate around evenly.
    • While the candy is still slightly warm, use a spatula to loosen it from the baking sheet. When cool, break it into uneven chunks.
    • Store cooled candy tightly wrapped; it'll stay fresh for a couple of weeks at room temperature. Freeze for longer storage.

    NOTES:
    • I used toasted almonds (and some TJ's almond meal I happened to have) to make it Jonah-friendly
    • I followed some other directions on their English Toffee post and put the chocolate chips on the bottom and sprinkled the nuts on the top.  I wouldn't do it that way again - the chips didn't quite melt and lots of the almonds just fell off the top.
    • Espresso powder = instant coffee (at least it was close enough to work and that's what I had on hand)
    • The baking soda step is an option, but it really does give it a better texture.  Teeny bubbles make it easier to eat.
    SOURCE:  https://www.kingarthurflour.com/recipes/dark-chocolate-buttercrunch-recipe
    https://blog.kingarthurflour.com/2018/12/10/tips-for-making-english-toffee/?fbclid=IwAR3w8efre0PX8BRyI4xvIVkxnK5vb0LuyyNIqNnwfvavJ9iW5T3K24AKfJ0

    (Somebody's) Mom's Caramels


    8 teaspoons (2 tablespoons + 2 teaspoons) vanilla extract
    2 cups (1 pound) unsalted butter
    4 cups (1 quart) half & half
    2 cups (1 pint, 16 fluid ounces) light corn syrup*
    4 cups granulated sugar
    2 cups light brown sugar
    2 teaspoons salt
    *See "tips," below.
    coarse flake sea salt for topping, optional; for salty caramels

    INSTRUCTIONS

    • Butter two 8" x 8" or 10 1/2" x 6 1/2" pans. Measure the vanilla into a small container, and set it aside for later.
    • Cut the butter into 1" chunks, to help it melt faster. Combine the cut-up butter, half & half, corn syrup, sugars, and salt in a heavy-bottom, 5- to 6-quart saucepan.
    • Heat the mixture over medium-low heat until everything has melted, stirring constantly. Attach a candy thermometer to the side of the pan.
    • Cook slowly, stirring constantly, until the mixture reaches 248°F, or until a small amount dropped in cold water forms a firm ball. As the mixture boils it will become thicker and thicker and the frothy bubbles will give way to a more blurpy bubble that resembles thick lava. This happens gradually, but you'll notice it around 230°F and higher. This is when you really have to pay attention and watch the temperature carefully, as it tends to move more quickly from 230°F up. The whole process will take about 2 hours.
    • Remove the pan from the heat, and carefully stir in the vanilla; the mixture will bubble and boil.
    • Quickly pour the caramel into the prepared pans. Don't add any residue from the pot into the pans; instead, scrape it into a separate container. Baker's treat!
    • Wait 30 minutes, then sprinkle with coarse-flake sea salt, if desired.
    • Cover the candy securely, and refrigerate.
    • Remove the candy from the pan by loosening its edges with a knife or offset spatula, and banging the pan on a cutting board until the slab releases from the pan. Allow the candy to warm up a bit if it's hard, or it'll shatter when you bang the pan.
    • Cut the caramels into squares, and wrap in waxed paper. Store in the refrigerator for longest shelf life. Wrapped caramels can also be frozen.
    • Yield: about 10 dozen 1" caramels.

    NOTES:
    • Delicious, but was quite a commitment, time-wise (see the photo).  I basically watched two episodes of something on Netflix (thanks, iPad) while stirring endlessly.
    • Consider making a half batch next time.  Today is December 30 and even after 2 family parties and a couple weeks of munching, I have a bunch still around
    • I poured a full batch into my oversized cake pan (roasting pan) sprayed with pam.
    • Flaked sea salt is perfect for this application.
    • I ordered these: http://www.clearcellobags.com/catalog/item/6501521/6344450.htm.  Well, actually it was the amazon equivalent, but Donna S sent me this cheaper link.  1000 should be enough for several years.
    SOURCE: King Arthur Flour

    Wednesday, November 7, 2018

    Citrus Sugar Gems

    Ingredients
    • 1 cup unsalted butter, at room temp
    • 1½ cup white sugar
    • 2 eggs
    • 2½ cups flour
    • 1 tsp cream of tartar
    • 1 tsp baking soda
    • ½ tsp salt
    • 2 Tbsp lemon zest
    • 2 Tbsp lime zest
    • coarse sugar for rolling cookies in
    Instructions
    1. Preheat oven to 350º.
    2. Using a mixer, beat the butter and white sugar at medium speed until light and fluffy. Add eggs and continue to beat for three more minutes.
    3. Combine the dry ingredients in a large mixing bowl and stir well. Add to the butter/sugar mixture and beat at medium speed for several minutes. Add zest and continue to beat for two more minutes.
    4. Roll dough into 1½" balls. Coat with coarse sugar. Place on a cookie sheet and bake for eight to ten minutes. Remove from pan and cool on cooling rack.

    Wednesday, March 7, 2018

    Maple Ginger Salmon

    1/4c maple syrup - best grade available
    2Tb soy sauce
    2tsp fresh ginger minced
    2tsp fresh garlic minced
    4 green onions divided
    1 lb salmon
    pepper

    • Preheat oven to 400
    • In a 9×13 baking dish, lightly pepper the salmon on both sides. If using low sodium soy sauce, salt the salmon to taste.
    • In a non-reactive bowl or measuring cup, combine the first four ingredients and the thinly sliced green onions
    • Pour the mixture over the salmon and let marinate for 20min. You may marinate for up to 30min.
    • Bake salmon at 400 for 20min
    NOTES: 
    • I've made this the past two years for Wigilia.  It's delicious and easy.
    • Garnish with a sprig of herb like thyme or rosemary.  The visual effect is totally worth the $$ you're going to pay to get fresh herbs in the middle of winter, even if that part gets thrown away before eating.  It's just pretty.  I'll add a photo someday when I find it.  Until then, just take my word for it.  ;-)
    • Do not make one piece per person for Wigilia.  Lots of us ended up having only half when there is so much other food to consume.
    • Source

    Mouth Watering Stuffed Mushrooms


    • 12 whole fresh mushrooms 
    • 1tablespoon vegetable oil 
    • 1 tablespoon minced garlic
    • 1 (8 ounce) package cream cheese, softened 
    • 1/4 cup grated Parmesan cheese 
    • 1/4 teaspoon ground black pepper
    • 1/4 teaspoon onion powder 
    • 1/4 teaspoon ground cayenne pepper

    Preheat oven to 350 degrees F (175 degrees C). Spray a baking sheet with cooking spray. Clean mushrooms with a damp paper towel. Carefully break off stems. Chop stems extremely fine, discarding tough end of stems.

    Heat oil in a large skillet over medium heat. Add garlic and chopped mushroom stems to the skillet. Fry until any moisture has disappeared, taking care not to burn garlic. Set aside to cool.

    When garlic and mushroom mixture is no longer hot, stir in cream cheese, Parmesan cheese, black pepper, onion powder and cayenne pepper. Mixture should be very thick. Using a little spoon, fill each mushroom cap with a generous amount of stuffing. Arrange the mushroom caps on prepared cookie sheet.

    Bake for 20 minutes in the preheated oven, or until the mushrooms are piping hot and liquid starts to form under caps.

    NOTES:
    • We've had these the past two years for Wigilia.  Tradition?
    • Costco's mushrooms are especially nice.
    • Source

    Saturday, December 17, 2016

    Grandma's (in)famous Cranberry Relish

    People have strong love/hate feelings about this recipe, but it's worth recording here.

    Ingredients
    16 ounce bag of rinsed raw cranberries
    2 crisp apples, cut into thick slices
    1 large, whole (peel ON) seedless orange, cut into sections
    1 to 2 cups granulated sugar (depending on how sweet you would like your relish to be)

    Method

    • Chop in your food processor until it's the texture you like.  Don't overprocess if you want it to be like Grandma's.
    • Mix in the sugar and store in a sealed container.  Start with one cup and add more later if necessary.


    "Fun" fact: Grandma likes to eat this as an ice cream topping.
    Funner fact: Make a batch for Thanksgiving and it'll still be good at Christmas.

    Wednesday, November 30, 2016

    Denise's Molasses Cookies

    Ingredients:
    1 ½ cups butter (softened)               
    2 cups white sugar                            
    2 eggs                                                 
    ½  cup molasses                                                                     
    4 cups flour

    1  Tlbs. baking soda
    1  tsp. salt
    2 tsp. cinnamon
    1  tsp. ginger
    1 tsp. cloves  

    Preparation and Instructions:

    Mix together all the wet ingredients, add all dry ingredients to that.  Preheat oven to 350 degrees roll dough into balls and roll in white sugar.  Bake for 8-10 minutes until tops are cracked.
    Cool on wire racks.


    Notes:
    - I usually double the amount of spices and toss in a heaping spoonful of fresh ginger paste if I have it available.
    - If you try to bake more than one pan at a time, they may not develop cracks in the top
    - I also sprinkle a couple of drops of water on the top of each to help encourage cracking.

    From Denise at Dad's office.

    Sunday, December 28, 2014

    Peanut Brittle

    Aka:

    THE BEST NUT BRITTLE YOU’LL EVER MAKE: EASY, DELICIOUS, AND DONE IN UNDER 30 MINUTES.


    1 cup granulated sugar
    1/2 cup light corn syrup
    1 1/2 cups salted peanuts
    1 tablespoon butter
    1 teaspoon baking soda
    1 teaspoon vanilla extract


    Directions
    1) Spray a wooden spoon (or other heat-proof stirring implement) with non-stick cooking spray. Lightly grease a baking sheet, or line it with parchment.
    2) Mix together the sugar and corn syrup in a large microwave-safe bowl and stir until well combined; the mixture will be stiff and hard to stir. Be sure to use a large enough bowl; the sugar/corn syrup should fill it no more than 1/4 to 1/3 full.
    3) Microwave the sugar mixture uncovered on high power for 5 minutes; it will bubble vigorously.
    4) Add the peanuts and butter, and stir well to combine. Speed is key! The cooler the mixture becomes the harder it will be to stir.
    5) Replace the bowl in the microwave and cook on high for 2 to 4 minutes, until the mixture turns a nice medium-brown caramel color. Start watching carefully around the 2-minute mark, and remove when the caramel color is achieved.
    6) Add the baking soda and vanilla. The mixture will bubble furiously upon the addition of these ingredients — this is what gives the candy its hallmark airy texture. (This is also why you need to use a large bowl.) Stir quickly to combine. The finished mixture will look creamy and caramelized.
    7) Working quickly, pour the mixture onto your prepared baking sheet and spread it as evenly as possible. If you end up with an uneven spread, don't worry — the candy should still set up nicely, even in the thicker areas.
    8) Once the brittle has set and cooled (30 to 60 minutes), break it into pieces.
    Yield: about 3 dozen pieces.

    NOTES:
    • There are lots of pictures of every step over here at King Arthur Flour.
    • Highly recommended!  This reminded me of the peanut brittle Grandpa used to make every Christmas but so much easier in the microwave.
    • Mine took about 10 minutes longer in my ancient microwave, but I just kept stirring and checking every minute or two until it was the right color.
    • It's worth noting that even though I used a clear glass bowl I had to take it out and look inside the bowl at the color.  It was definitely a different color in the middle of the bowl than on the edges.  Weird eh?  Even so, it would have overcooked had I waited until the outside color were dark enough.
    • They aren't kidding when they say it goes fast - be prepared.  I poured this on my room temperature baking sheet and barely got it spread before it set.  Note to self: next time, try warming up the pan a bit.

    Friday, December 19, 2014

    Hanson's Ginger Cookies

    1 c. (2 sticks) butter
    1 c. granulated sugar
    1 c. light molasses
    1 tbsp. vinegar
    2 eggs, slightly beaten
    51/2 c. flour
    1 tsp. cinnamon
    1 tsp. ginger
    1 tsp. baking soda
    1/2tsp. salt

    For frosting:
    2 c. powdered sugar
    1/3c. unsalted butter, softened
    1/2tsp. vanilla extract
    2 to 3 tbsp. milk

    To make cookies: In a large saucepan over medium heat, combine butter, granulated sugar, molasses and vinegar and slowly bring to a boil. Remove from heat, cool to room temperature and whisk in eggs.

    In a large bowl, combine flour, cinnamon, ginger, baking soda and salt. Stir flour mixture into molasses mixture until dough is smooth and satiny. Divide dough (it will be extremely soft) into 2 portions. Wrap each portion in plastic wrap and refrigerate for at least 2 hours or up to several days.

    When ready to bake cookies, preheat oven to 375 degrees. Let dough stand at room temperature for a few minutes until it is pliable enough to roll. Roll dough out on a board (flour is not needed) and cut using favorite cookie cutters. Bake on lightly greased baking sheets for 10 minutes. Remove from oven, let rest for 5 minutes then remove cookies to a wire rack and cool completely.

    To make frosting: In bowl of an electric mixer on medium speed, beat powdered sugar, butter, vanilla and 2 tablespoons milk, adding more milk until frosting is consistency required. Frost completely cool cookies and serve.

    NOTES:
    • These roll well and make really good gingerbread men.
    • My original recipe is a newspaper cut out from the Star Trib and calls for a cup of margarine rather than the butter called for in this version.  The butter would obviously taste better, but I've been making these for years with margarine.
    • They make great tree ornaments and the cookies store really well.
    • I have a note that a double batch makes 30 big gingerbread men. (I gave them as gifts one year.)
    • Source

    Raspberry Almond Shortbread Thumbprints

    Cookie
    1 cup butter, softened
    2/3 cup sugar
    1/2 teaspoon almond flavoring
    2 cups all-purpose flour
    1/2 cup seedless raspberry jam in a squeezable container

    Glaze
    1 cup powdered sugar
    2 to 3 teaspoons water
    1 1/2 teaspoons almond extract

    Combine softened butter, sugar and 1/2 teaspoon almond flavoring in bowl. Beat at medium speed, scraping bowl often, until creamy. Add flour; beat at low speed, scraping bowl often, until well mixed. Cover; refrigerate at least 1 hour or until firm.

    Heat oven to 350°F.

    Shape dough into 1-inch balls. Place 2 inches apart onto ungreased cookie sheets. Make indentation in center of each cookie with thumb (edges may crack slightly). Fill each indentation with about 1/4 teaspoon jam.

    Bake 14-18 minutes or until edges are lightly browned. Let stand 1 minute on cookie sheets; remove to cooling rack. Cool completely.

    Combine all glaze ingredients in bowl with whisk until smooth. Drizzle over cookies.

    NOTES:

    • Really outstanding cookie
    • The squeezable jam isn't essential, but really does make everything easier.
    • Source