Friday, December 20, 2013

Cut out Sugar Cookies

This recipe was everything it promised!
  • It requires NO CHILLING!
  • The dough can be frozen!
  • The baked cookies can be frozen!
  • The decorated cookies can be frozen!
  • And more importantly, it's yummy.


3 cups unbleached, all-purpose flour
2 teaspoons baking powder
1 c sugar 
2 sticks (salted) butter, cold & cut into chunks
1 egg
3/4 tsp pure vanilla extract
1/2 tsp pure almond extract

Instructions:

Preheat oven to 350.

Combine the flour and baking powder, set aside. Cream the sugar and butter. Add the egg and extracts and mix. Gradually add the flour mixture and beat just until combined, scraping down the bowl, especially the bottom.

The dough will be crumbly, so knead it together with your hands as you scoop it out of the bowl for rolling.

Roll on a floured surface to about 1/4" to 3/8" thick, and cut into shapes. Place on parchment lined baking sheets (I recommend freezing the cut out shapes on the baking sheet for 5 minutes before baking) and bake for 10-12 minutes. Let sit a few minutes on the sheet, then transfer to a cooling rack. 

My Notes:  Seriously, this was the easiest to handle dough I've ever used!  If I could find a pie crust equivalent, I'd be set!

Source: Bake at 350

Update: one batch Mede 62 of these.

Saturday, December 14, 2013

Marzipan


  • 300g almond meal or blanched almonds 
  • 150g powdered sugar 
  • 2 egg whites 
  • 1-2 tsp almond extract 
If using blanched almonds, grind to a very fine texture in blender (in batches) or food processor, just to the point where clumps of it start sticking together. You may need to sift and regrind a portion, depending on how thorough your first grind was. Add remaining ingredients and knead together (if you are using a food processor, you can probably switch to a plastic blade and do it all in there).

 Note: This was very much a case of playing it by ear. Adjust quantities as needed for the taste and texture desired. I keep meaning to get a bottle of Kirsch to have on hand, and would totally have subbed it for the extract here if I did.

Sunday, December 8, 2013

Almond Roca

1 cup brown sugar
1/2 pound butter
3 almond hershey bars, chopped

Chop bars and place on cookie sheet.
Melt better, add sugar and stir constantly.
Turn head down to keep boiling until 280 degrees.
Pour over candy bars and quickly spread it around with the back of a spoon.


Store in a dry place.
And you'll probably want a double batch.

Tuesday, November 19, 2013

Creamy Tomato Basil Soup

First of all, Molly's version:
Ingredients
1 medium onion
2 Tbsp butter
2 cans diced tomatoes
2 cans tomato soup
1 1/2 cups milk
1 tsp sugar
1 tsp dried basil
1 tsp paprika
1/4 tsp garlic powder
1 8 oz package cream cheese, cubed
Directions:
Saute onions in butter. Stir in tomatoes, soup, milk, and spices. Bring to a boil. Reduce heat, cover, and simmer ten minutes. Stir in cheese until melted (or "melty").
I was making it for a group so I needed a bigger batch and I had some random, related things on hand so this is what I did:

  • 2 (on the small side of) medium onions, chopped 
  • Saute in some butter
  • 1 carton of Aldi's Roasted Red Pepper Tomato soup
  • a bunch of leaves from my basil plant
  • 16 ounces of softened cream cheese
Puree it all with an immersion blender, heat, then add:
  • 2 tsp. paprika
  • 3/4 tsp garlic powder
  • 2 28 ounce cans of petite diced tomatoes
Heat and serve with buttery croutons.
It was a hit with the Core Team!
Apologies for the terrible picture.  It tastes much better than this makes it look.

Friday, October 25, 2013

Skillet Chicken with Artichokes

4 large boneless skinless chicken breast halves
3/4 teaspoon salt-free herb seasoning
1 jar (6 ounces) marinated quartered artichoke hearts, drained and marinade reserved
1 tablespoon all-purpose flour
1/2 cup water
1/4 cup dry white wine or water
1 teaspoon chicken bouillon granules
12 small fresh mushrooms, cut in half
1 tablespoon minced fresh parsley


  • Sprinkle chicken with herb seasoning. In a medium skillet, heat 3 tablespoons of the reserved marinade. Add chicken and brown 3-4 minutes on each side.
  • Drain all but 1 tablespoon of marinade in skillet. Push chicken to one side and stir in flour. 
  • Add the water, wine and bouillon. Stir until mixture boils and sauce is lightly thickened. 
  • Stir in the artichokes and mushrooms. 
  • Cover and simmer on very low heat 20 minutes or until the chicken is tender. 
  • Sprinkle with parsley. 
  • Serve on a bed of rice or noodles. 
  • Yield: 4 servings.
NOTES:
  • Obviously not my picture.  In fact, my chicken was a little on the grey-ish side.  Not my first choice, and I'm not sure if it can be attributed to the cast iron pan or the artichoke marinade.
  • I didn't have dry white wine, but that would be really good.  (And now a decent German white or two is on my Costco list.)
  • I used canned mushrooms and dried parsley.  Fresh mushrooms would be nicer looking, but after cooking 20 minutes I'm sure the texture of canned vs. fresh is identical.  Dried parsley was fine and I would not hesitate to do it that way again.
  • Very good and super easy.  I would definitely make this again.
  • I served it over brown rice.
  • Source

Friday, October 18, 2013

Apple Upside-Down Cake

Possibly better than pineapple.


Topping  

  • 4 T unsalted butter, plus extra for pan
  • 4 Granny Smith apples or Golden Delicious (about 2 pounds), peeled and cored
  • 2/3 cup packed light brown sugar (4 2/3 ounces)
  • 2 tsp juice from 1 lemon

Cake  

  • 1 c unbleached all-purpose flour (5 ounces)
  • 1 T cornmeal (optional)
  • 1 tsp baking powder
  • 1/2 tsp table salt
  • 3/4 c granulated sugar (5 1/4 ounces)
  • 1/4 c packed light brown sugar (1 3/4 ounces)
  • 2 eggs
  • 6 T unsalted butter, melted and cooled slightly
  • 1/2 c sour cream
  • 1 tsp vanilla extract

Butter bottom and sides of 9-inch round, 2-inch-deep nonstick cake pan; set aside. Adjust oven rack to lowest position and heat oven to 350 degrees.

Cut 2 apples into 1/4-inch-thick slices; set aside. Cut remaining 2 apples into 1/2-inch-thick slices. Heat butter in 12-inch skillet over medium-high heat. When foaming subsides, add 1/2-inch-thick apple slices and cook, stirring 2 or 3 times, until apples begin to caramelize, 4 to 6 minutes. (Do not fully cook apples.) Add 1/4-inch-thick apple slices, brown sugar, and lemon juice; continue cooking, stirring constantly, until sugar dissolves and apples are coated, about 1 minute longer. Transfer apple mixture to prepared pan and lightly press into even layer. Set aside while preparing cake.

Whisk flour, cornmeal, baking powder, and salt together in medium bowl; set aside. Whisk granulated sugar, brown sugar, and eggs together in large bowl until thick and homogeneous, about 45 seconds. Slowly whisk in butter until combined. Add sour cream and vanilla; whisk until combined. Add flour mixture and whisk until just combined. Pour batter into pan and spread evenly over fruit. Bake until cake is golden brown and toothpick inserted into center comes out clean, 35 to 40 minutes.

Cool pan on wire rack 20 minutes. Run paring knife around sides of cake to loosen. Place wire rack over cake pan. Holding rack tightly, invert cake pan and wire rack together; lift off cake pan. Place wire rack over baking sheet or large plate to catch any drips. If any fruit sticks to pan bottom, remove and position it on top of cake. Let cake cool 20 minutes (or longer to cool it completely), then transfer to serving platter, cut into pieces, and serve.

Notes: If you use less-firm apples, you might not get them to caramelize well. I managed to just squeeze this into a 1.5" deep pan. I put a cookie sheet under just in case, but it didn't overflow.

Wednesday, October 9, 2013

Teriyaki Stir Fry

I'm a little embarrassed to post this right after Holly's pasta masterpiece, but here goes.
Teriyaki stir fry mix from Aldi

  • I bought this product at Aldi and we thought it was pretty good.
  • It required the same basic skill level as boxed macaroni and cheese, but there were lots of actual vegetables involved and the sauce was not over salted or sweet.
  • This version is vegetarian and 37 ounces.  It says 8 servings, but I'd guess closer to 5 or 6.
  • I added shrimp, but it would also be good as is or with leftover pork or chicken.
  • Anyway, not gourmet by any stretch of the imagination, but a perfectly acceptable meal when a quick one is needed.


Monday, October 7, 2013

Pasta and Red Pepper Tuna Sauce with Anchovies, Garlic, and Basil

Pasta so good I took a picture!  From Cook's Illustrated Italian Classics.  The sauce comes together very quickly; start the pasta water first.

Serves 4-6.

6 Tbsp olive oil
6 cloves of garlic, minced or pressed through a garlic press (about 2 Tbsp)
1/2 tsp hot red pepper flakes
2 anchovy fillets, minced (no really - go for it!)
1 cup (about 7 oz.) jarred roasted red peppers, cut into 1/2" pieces (these weren't too expensive at the grocery store, but if you anticipate using a quantity, they were a better price at Costco)
1/2 c dry white wine
2 (6 oz.) cans solid white tuna in water, drained well and chunks broken up with fingers (We prefer tuna in olive oil, so that's what I used - better texture and flavor, IMO)
Salt
1 lb. pasta
1 Tbsp lemon juice (I subbed vinegar)
2 Tbsp chopped fresh basil or fresh parsley
Ground black pepper

  1. Bring pasta water to a rolling boil.
  2. Heat 3 Tbsp oil, 1 Tbsp garlic, and the red pepper flakes in a 12-inch skillet over medium-high heat, stirring frequently, until fragrant and sizzling but not browned (1-2 minutes).  Add the anchovies and roasted red peppers and cook, stirring constantly, until slightly dry (about 30 seconds).  Add the wine and bring to a simmer; simmer until the aroma bears no trace of alcohol (about 1 minute).  Add the tuna and 2 tsp. of salt and cook, stirring frequently, until the tuna is heated through (about 1 minute).
  3. Cook pasta to al dente.  Drain, reserving 1/4 c. cooking water.  Return the pasta to the pot and toss with the tuna mixture, remaining oil and garlic, lemon juice, basil, and reserved pasta water as needed.  Season with salt and pepper to taste.  Serve immediately.
Also excellent as leftovers.


General Tso's Chicken

This was fantastic!  There are a few specialty ingredients, but they were all pretty cheap (and enough to make many, many batches of this).  I wasn't sure how the cornstarch battering was going to work out, but it was so easy and perfect.  Adapted slightly from The Chinese Takeout Cookbook.

Serves 4.

Marinade:
1 Tbsp soy sauce
1 Tbsp Chinese rice wine or dry sherry (I used regular white wine)
2 large egg whites

1 lb. boneless, skinless chicken thighs, cut into 1-inch cubes

1 tsp white sesame seeds (optional)

Sauce:
1/4 c chicken stock or water
1 1/2 Tbsp tomato paste
1 Tbsp soy sauce
1 Tbsp white rice vinegar (I used regular)
1 tsp hoisin sauce (from the asian aisle)
1 tsp chili sauce (I used sriracha)
1 tsp sesame oil (I used canola)
1 Tbsp sugar
1 tsp cornstarch

1 1/2 cups cornstarch
salt and pepper
3 cups oil for frying (I doubt I used this much)
8 dried whole red chilies, or 1/4 tsp crushed red pepper flakes (I used the flakes; omit for the spice-sensitive)
2 cloves garlic, minced
Scallions or green onions, for garnish


  1. Marinate the chicken: In a large bowl, combine soy sauce, wine, and egg whites.  Add the chicken and stir gently to coat.  Let stand at room temperature for 10 minutes.
  2. (If using sesame seeds) In a small pan, toast the sesame seeds for about 1 minute, until they become lightly brown and aromatic.  Transfer to a dish and set aside.
  3. Prepare the sauce: In a small bowl, combine the chicken stock, tomato paste, soy sauce, vinegar, hoisin sauce, chili sauce, oil, sugar, and cornstarch.  Stir until the sugar and cornstarch are dissolved.  Set aside.
  4. Toss the 1 1/2 cups cornstarch with salt and pepper (about 1/2 tsp each) in a large bowl or deep plate.  Coat the marinated chicken in the cornstarch mixture and shake off any excess before frying (Note: You should have the oil heated before coating the chicken, or the cornstarch coating gets pasty.  I don't know if this affects the finished product, but it doesn't seem ideal).
  5. Heat the frying oil in a wok or heavy-bottomed pot until it registers 350 on an instant-read thermometer.  Working in 2 or 3 batches, add the first batch of chicken cubes and deep-fry until lightly golden on the outside and cooked through, 3-4 minutes.  Remove the chicken with a slotted spoon and drain on a plate lined with paper towels.  Repeat with the rest of the chicken.  (Optional: To get the chicken extra crispy, allow the chicken to drain and cool for 5 minutes, then put the chicken back in the wok to fry for about another 30 seconds, until golden brown.)
  6. Transfer the oil to a heat-proof container.  Leave a light coating of oil in the pan, and heat over medium-high heat until a bead of water sizzles and evaporates on contact.  Add the chilies and garlic and stir just until fragrant, about 20 seconds.  Pour in the sauce mixture and heat briefly to thicken.
  7. Return the chicken to the wok and stir well to coat with sauce (I didn't think there would be enough sauce, but keep stirring, and it will cover.).  Transfer the chicken to a serving dish.  Garnish with sesame seeds and scallions and serve.


Sunday, September 29, 2013

Pumpkin Ravioli

Pasta

  • 2 c flour
  • 3 eggs (or 2 eggs and 2 yolks, if rollling by hand)
  • ¼ tsp salt
  • 2 T olive oil

Filling

  • 1 c pumpkin puree
  • 1 c grated Parmesan (grated on a Microplane)
  • 1 egg
  • ½ tsp freshly grated nutmeg
  • ¼–½ c bread crumbs
  • salt to taste

Sauce

  • 4 T butter
  • 1 small shallot, finely minced
  • 2 tsp. fresh sage
Place flour on countertop, create a large well in the middle. Add the other ingredients to the well and beat with a fork, slowly incorporating flour. Knead until smooth and well-combined, and shape into a log. Wrap in plastic wrap and let rest on counter, 15 minutes if rolling by machine, and 1–4 hours if rolling by hand.

For filling, combine pumpkin, cheese, egg, and nutmeg. Add bread crumbs a couple tablespoons at a time, until mixture is thick enough to stand in coherent spoonfuls.

To shape pasta, divide into six pieces and roll out, on an unfloured surface, one at a time to approximately 6"x18", and see-through, about 1/32" thick. (If rolling by hand, alternate rolling and stretching for best results.) Place four or five scant tablespoons along one side of the sheet, a couple of inches apart, and trace around each with a fingertip dipped in water. Fold the sheet in half, cut in between the scoops of filling, and press edges around each to seal.

To make sauce, melt butter over medium heat in a shallow pan or skillet, until it just begins to brown (it's easiest to see this in a light colored pan. Add shallot and cook until softened (butter will continue to brown). Remove from heat, add sage and set aside while pasta cooks.

Cook pasta four or six at a time in boiling salted water for about 5 minutes. Toss with sauce and serve immediately with plenty of extra Parmesan. 

Notes: I ended up with 24 ravioli, with about 1/3 of the filling left over. I think if I were using a pasta machine, I would have been able to get the pasta rolled thinner, and probably used all the filling on 36 ravioli. 

To freeze, place uncooked ravioli on a baking rack for half an hour or so, until surface is slightly dry. Freeze with parchment or wax paper between layers.

Everyone loved these, including Linus. It was a great Friday dinner.

Tuesday, September 17, 2013

Steak Fajitas


Ingredients:
  • 1 Tbsp vegetable oil
  • 1 lb of flank steak, skirt steak
  • 1 large yellow onion, peeled and sliced 
  • 2-3 bell peppers of various colors, stemmed, seeded, de-ribbed, sliced lengthwise into strips
  • Salt
Marinade:

  • Juice of 1 lime
  • 2 Tablespoons of olive oil
  • 2 cloves garlic, peeled, minced
  • 1/2 teaspoon ground cumin
Mix all marinade ingredients. Coat the steak with the marinade and let it sit at room temperature for an hour, or longer in the fridge. Before you cook the meat, wipe off most of the marinade and sprinkle the steak with salt.

Set a large cast iron pan over high heat and let this heat up for 1-2 minutes. Add the tablespoon of oil to the pan and let this heat up for 1 minute. Add the steak, frying on each side for 3 minutes, or to desired doneness. 3 minutes per side will yield approximately medium rare doneness for an average cut of flank steak. Skirt steak will need less time. If the pan starts to smoke too much, reduce the heat to medium-high. You want the steak browned, not burned. Remove from pan and let sit, tented with foil, for 5 minutes.

Cook the vegetables while the meat is resting. Add a little more oil to the pan if necessary, then add the onions and bell peppers. Let these sear for 1 minute before stirring, then stir every 90 seconds or so as the veggies sear. Cook for 5-6 minutes total.

NOTES:
  • Source
  • It also called for 1/2 a fresh jalapeno, which I didn't have, so I gave the meat a few shakes of tabasco sauce.
  • Instead of marinading the meat, I pre-sliced it and just cooked it in the marinade ingredients.  I wouldn't hesitate to do it that way again, although I'm sure the recommended way is good too.
  • I served them in this tremendous product.  Very nice, indeed!
Apologies for the lack of a photo, but basically they just looked like fajitas.  :)

Friday, September 13, 2013

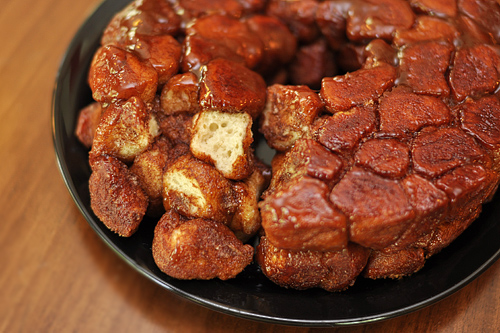
Monkey Bread

We made this.  It was good.  Possibly only good warm though. 


But really good when warm.

Thursday, September 12, 2013

Lemon Pepper Pasta

Holy cow, is this delicious!  I made it last night with the cucumber chicken recipe from the church cookbook, but it would be fantastic just buttered and on it's own, or I'm dreaming of some kind of light, lemony cream sauce.  (And the recipe on the package suggests serving it with shrimp!)  Next time I go to Trader Joe's, I'm going to pick up several packages.

Slow Cooker Pepper Steak

I followed this link from Jen's 7 Quick Takes last week and we all found it to be as delicious as they did.

2 pounds beef sirloin, cut into 2 inch strips
 garlic powder to taste
 3 tablespoons vegetable oil
 1 cube beef bouillon
 1/4 cup hot water
 1 tablespoon cornstarch
 1/2 cup chopped onion
 2 large green bell peppers, roughly chopped
 1 (14.5 ounce) can stewed tomatoes, with liquid
 2 tablespoons soy sauce
 1 teaspoon white sugar

  • Sprinkle strips of sirloin with garlic powder to taste. In a large skillet over medium heat, heat the vegetable oil and brown the seasoned beef strips. Transfer to a slow cooker.
  • Mix bouillon cube with hot water until dissolved, then mix in cornstarch until dissolved. Pour into the slow cooker with meat. Stir in onion, green peppers, stewed tomatoes, soy sauce, sugar, and salt.
  • Cover, and cook on high for 3 to 4 hours, or on low for 6 to 8 hours.

NOTES:

  • The original recipe called for a beef bouillon cube, 3 tablespoons of soy sauce and a teaspoon of salt.  That's a ridiculous amount of sodium so I cut out the salt and only used 2 tablespoons of soy sauce.  We thought it was good (and it would be easy to add more soy sauce at the end of the process if you didn't agree).
  • I used venison instead of beef and that worked well too.  This would be a good place to use a cheaper cut of meat, just be sure to cut it across the grain.
  • It was pretty fantastic to have dinner done when I got home today. :)  (Why don't I do more crock pot meals?)


Monday, August 26, 2013

Grandpa's Buttery Corn

  • 3 c water
  • ½ cup sugar
  • ½ tsp salt
  • 1 stick of butter
  • 10 cups corn kernels, blanched
Combine all ingredients in a large pot and boil for 3 minutes. Cool and divide into ziplocs before freezing.

Saturday, August 17, 2013

Strawberry-Peach Slush (boozy or otherwise)

2 small peaches (or one large)
1 cup frozen strawberries
1 oz lemon juice (the yummy Costco stuff is preferable)
Sugar or simple syrup to taste (about 1/2 c.)
7 ice cubes
Blend all ingredients, adding a bit of water or club soda if necessary to keep things loose in the blender. Pour into tumblers or margarita glasses. Add alcohol or top off with club soda if desired.

Monday, August 12, 2013

Mom's Birthday Cocktail


As per usual, quantities are approximate and to taste (with the lemon juice especially).  Instead of ice cubes, I used frozen berries (a blackberry, raspberry, blueberry blend).

Frozen berries
1.5 oz Orange Curacao (or your orange liqueur of choice)
.5-.75 oz lemon juice
3 oz Coconut mineral water
A few mint leaves, mottled (We used chocolate mint)

Source: Kinda, sorta inspired by this drink.

Saturday, August 10, 2013

Popovers

I can't believe I've never made these before.  They were so easy and good!

1 1/4 cups milk
1 tbls. butter, melted and cooled
1 cup flour
1/4 tsp salt
2 eggs


  • Beat the milk, butter, flour and salt until blended.  Add eggs, one at a time, beating well after each addition.  
  • Grease pans with butter and put in the preheated oven for two minutes (time it or your butter will over brown)
  • Fill buttered popover pan between 1/2 and 3/4 full.  Bake at 450 for 15 minutes.  Reduce heat to 350 and bake for 20 minutes longer or until very firm.
  • Remove from oven; prick each with a sharp knife to allow steam to escape.  Serve warm.
NOTES:

  • Do not open the oven to peek at them while baking!
  • There was enough batter for 8, but my (borrowed) pan holds 6.  I'll probably want to reconcile that somehow before I try this recipe again.
  • UPDATE - for my new mini pan I baked for 10-12 minutes at 450 and then 10-12 at 350.

Saturday, August 3, 2013

Creamy Dilled Cucumber Salad

1 large cucumber (sliced)
1/4 cup red onion (sliced)
1/4 cup sour cream
1 tablespoon lemon juice
1 teaspoon sugar (optional)
1 handful dill (chopped)
salt and pepper to taste

Mix everything and chill.

NOTES:

  • This is 4-5 servings.
  • Very mild flavor (You could add a little garlic, salt and pepper to make it a little more like tzatziki, or even change out the sour cream/lemon juice for some Greek yogurt.)
  • I used about a teaspoon or so of dill weed instead of fresh, but fresh would be better.
  • Red onion is not essential ( I used a yellow.)
  • Good, easy, super fast to throw together.

Wednesday, July 24, 2013

Zucchini Bread

'Tis the season ...


NOTES:

  • This is obviously a well-used recipe but I never noticed until today that it says "ground" zucchini (or that I misspelled it for that matter).  Anyway, I always shred it.
  • Freezes well.

Friday, July 19, 2013

Rose's Lime Substitute

Only without the high fructose corn syrup.

2 cups lime juice
¾ cup sugar
½ cup water

Heat water in the microwave or on the stove until almost boiling. Remove from heat. Add sugar and stir until dissolved. (You just made simple syrup.) Let cool. Mix with lime juice. Your sweetened lime juice will keep a couple of weeks in the fridge.

For future reference, or if you want to make a smaller amount, the ratio of sugar to water in simple syrup is 3:2. In sweetened lime juice, the ratio of lime juice to simple syrup is 2:1.

Same goes for making your own sour mix. Substitute lemon juice for lime juice and you’ve got homemade sour mix. It’s that easy.

NOTES:

  • I'm drinking a gin gimlet as I type this.
  • I recommend Hendrick's Gin for this purpose.  1:1 ratio.
  • Couldn't be easier.
  • I made a half batch and stored it in an 8 ounce lime juice bottle saved for this purpose.  (Plus I had enough left over for a couple drinks.)
  • Source

Saturday, July 13, 2013

Peaches and Cream French Toast

1/2 c butter
1 c brown sugar
2 tbsp reserved juice from canned peaches
1 29 oz can of peaches, drained
1 French baguette, cubed
8 oz cream cheese, cut into small pieces
12 eggs
1 1/2 c half-n-half
1 tsp vanilla

Heat butter, sugar and peach juice in saucepan until bubbly.  Pour into a 13x9 inch casserole dish.  Scatter peach slices over caramel sauce.  Top with bread cubes then pieces of cream cheese.  Place eggs, half-n-half, and vanilla in blender; blend to combine.  Pour egg mixture over bread and cream cheese.  Cover and refrigerate at least an hour but preferably overnight.  Bake, uncovered, in 350F oven for 50-60 minutes.


NOTES:

  • I made a 1/2 batch in a smaller baking dish and it was just right for 5.
  • I had some leftover croissants that I used instead of a baguette.  Worked well.
  • I cut up the peaches so they would distribute better.
  • Very good - not as sweet as expected.  Would definitely make it again.
  • Source.

Friday, July 12, 2013

Soft Gingerbread Cookies

Ingredients

  • 3/4 cup butter, softened
  • 1 cup sugar
  • 1 egg
  • 1/4 cup molasses
  • 2-1/4 cups all-purpose flour
  • 2 teaspoons ground ginger
  • 1 teaspoon baking soda
  • 3/4 teaspoon ground cinnamon
  • 1/2 teaspoon ground cloves
  • 1/4 teaspoon salt
  • Additional sugar

Directions

  • In a large bowl, cream butter and sugar until light and fluffy. Beat in egg and molasses. Combine the flour, ginger, baking soda, cinnamon, cloves and salt; gradually add to the creamed mixture and mix well.
  • Roll into 1-1/2-in. balls, then roll in sugar. Place 2 in. apart on ungreased baking sheets. 
  • Bake at 350° for 10-12 minutes or until puffy and lightly browned. Remove to wire racks to cool. 
  • Yield: 2-1/2 dozen.
Notes
  • The only real change I made was to add about 1/3 cup (or maybe a little more) of chopped ginger root left over from this recipe.  (Yes, it has been in my freezer since 11-10 and it's still delicious!)  Because of that, I reduced the powdered ginger to 1 tsp.
  • Source

Friday, July 5, 2013

Classic Lemon Bars

Crust:
1/2 cup plus 3 tablespoons cold unsalted butter, cut into 1-inch pieces, plus more for pan
1 1/2 cups unbleached all-purpose flour
1/2 cup confectioners' sugar
3 tablespoons cornstarch
1 1/2 teaspoons salt

Filling:
2 cups granulated sugar
4 large eggs, lightly beaten
3 tablespoons unbleached all-purpose flour
1/2 cup plus 2 tablespoons plus 3/4 teaspoons freshly squeezed lemon juice
1 1/2 teaspoons coarse salt
1/4 cup plus 1 tablespoon milk
1/4 teaspoon coarse salt


To make crust: In the bowl of a food processor, combine all the dry crust ingredients. Process briefly until they're mixed.  Add butter to processor and process until mixture resembles a coarse meal, about 10 seconds. If you don't have a food processor, whisk together flour, confectioners' sugar, cornstarch, and salt in a large bowl. Add butter and work into flour mixture using a pastry blender or your fingers.

Pour crust mixture into sprayed (or buttered) cake pan, pressing down with your fingers to create a 1/4-inch-thick layer along the bottom and 1/2-inch up the sides, pressing firmly at the edges to seal. Transfer pan to freezer and freeze for 30 minutes. Transfer to 350 degree oven and bake, rotating pan once during baking, until golden brown, about 20 minutes.

Meanwhile, make the topping: In a large bowl, whisk together sugar, eggs, and flour; stir in lemon juice, milk, and salt until well combined.

Remove baking pan from oven. Stir topping and pour into warm crust. Return pan to oven and continue baking until topping is just set but not browned, about 20 minutes.

NOTES:
  • Original source here.  
  • It's rare to find a recipe from a professional source, yet so poorly written.   The filling and crust ingredients are randomly jumbled together and there is no effort made to differentiate which measurement of salt and flour goes with which part of the recipe.  I divided it into what I did above and it worked, for what it's worth.
  • Also, the original recipe starts with having you turn on the oven and then tells you to mix the crust and put it in the freezer for 30 minutes.  It takes my oven about 5 minutes to pre-heat, so I also adjusted that direction as well.
  • The crust calls for 1 1/2 tsp. of salt which is definitely on the high side.  It does make kind of an interesting combination with the sour topping, but feel free to divide that amount in half if you don't think you'd like that.  Really, it would be good either way.
  • Despite the writing, the bars are delicious and the crust has a nice shortbread quality that is still firm the next day.


Saturday, June 29, 2013

Sour Cherry Slab Pie

From Smitten Kitchen, with cherries from Emily.  We ate this (and practically nothing else) for several days.  I used the pie crust recipe listed, but with shortening instead of butter (just because I have lots of the former).  I don't have a rolling pin at the moment, so I was stuck using a wine bottle, which is less effective.  I rolled the bottom crust out the best I could, then just pressed it onto the pan.  For the top, I rolled out strips and just laid them across the top.  It worked out just fine.  This would also be particularly good with rhubarb or something else tart.


Sour Cherry Slab Pie
Yield: Varies, but I cut mine into 20 2 1/2-inch by 3-inch pieces
1 1/2 All Butter, Really Flaky Pie Doughs, divided, patted into thick rectangles, wrapped in plastic and chilled for at least an hour in the fridge
6 cups sour cherries, pitted (fresh or frozen will work; if frozen, defrost and drain first)
3/4 to 1 1/4 cups of sugar*
1/4 cup cornstarch
Juice of half a lemon
Pinch or two of salt
2 tablespoons heavy cream or one egg, beaten with a tablespoon of water
Glaze:
1 cup confectioners’ sugar
1 to 2 tablespoons milk or water or 1 tablespoon water plus 1 tablespoon lemon juice (I did this to make the glaze more interesting)
Preheat oven to 375°. In a large bowl, combine cherries, sugar, cornstarch, lemon juice, and salt. Stir to combine; set aside.
On a lightly floured surface, roll out the larger piece of dough into an 18-by-12-inch rectangle. I won’t lie: this can be kind of a pain because it is so large. Do your best to work quickly, keeping the dough as cold as possible (and tossing it in the freezer for a couple minutes if it softens too quickly; it is summer afterall) and using enough flour that it doesn’t stick to the counter. [See more of my pie-rolling tips here.]
Transfer to a 15-by-10-by-1-inch rimmed baking sheet, (pastry will hang over sides of pan). I went ahead and lined mine with parchment, just to ensure I’d be able to easily lift it out. Pour cherry mixture into lined baking sheet; set aside.
On a lightly floured surface, roll out remaining piece of dough into a 16-by-11-inch rectangle. Drape over filling. Bring bottom pastry up and over top pastry. Pinch edges to seal. Using a fork, prick top crust all over. Brush with heavy cream or egg wash.
Bake until crust is golden and filling is bubbling, 40 to 55 minutes. Transfer to a wire rack until just warm to the touch, about 45 minutes.
In a medium bowl, stir together confectioners’ sugar and milk, water or lemon juice (or combination thereof) until desired glaze consistency is achieved. Use a spoon to drizzle over top. Serve warm or room temperature.
* Martha had suggested 1 to 1 1/2 cups sugar for 6 cups of sour cherries. I balked, imagining my beautiful Jersey cherries drowning a syrupy death, and used 3/4 cup, which yielded a lightly-sweetened pie with the tartness of the cherries still coming through, just as we like. Please adjust this to your tastes, and according to the tartness of the cherries you brought home.


Buttermilk Biscuits with Sausage Gravy

No picture because we were too impatient.

Via Brown Eyed Baker and not altered.  You could use your own biscuit recipe, but these were perfect with the gravy.


INGREDIENTS:

For the Biscuits:
1 cup all-purpose flour
1 cup cake flour
1 teaspoon granulated sugar
2 teaspoons baking powder
½ teaspoon baking soda
½ teaspoon salt
½ cup unsalted butter, chilled, cut into small pieces
¾ cup buttermilk
For the Sausage Gravy:
1 pound breakfast sausage
⅓ cup all-purpose flour
4 cups whole milk
2 teaspoons black pepper
½ teaspoon seasoned salt

DIRECTIONS:

1. Make the Biscuits: Preheat oven to 450 degrees F. Line a baking sheet with parchment paper or a silicone baking mat (do not grease your baking sheet).
2. Place the flours, sugar, baking powder, baking soda and salt in a large bowl or the workbowl of a food processor fitted with the metal blade. Whisk together or process with six pulses.
3. If making by hand, use a pastry blender or your fingertips to quickly cut in the butter until the mixture resembles coarse meal with a few slightly larger butter lumps. If using a food processor, distribute the butter evenly over the dry ingredients. Cover and process with twelve pulses.
4. If making by hand, stir in the buttermilk with a rubber spatula or fork until the mixture forms a soft, slightly sticky ball. If using a food processor, remove the cover and pour the buttermilk evenly over the dough. Process until the dough gathers into moist clumps, about eight pulses.
5. Transfer the dough to a lightly floured surface and quickly form into a rough ball. Be careful not to overmix. Pat the dough into a ¾-inch-thick circle. Cut out the dough rounds with a 2-inch biscuit cutter. Push together the remaining pieces of dough, again pat into a ¾-inch-thick circle, and cut out several more dough rounds. Discard the remaining scraps. Place the biscuits on the prepared baking sheet.
6. Bake until the biscuit tops are light brown, 10 to 12 minutes. Remove baking sheet to a wire cooling rack while the sausage gravy is prepared.
7. Make the Sausage Gravy: Cook the sausage in a large skillet over medium-high heat until no longer pink, crumbling it into bite-size pieces as it cooks.
8. Reduce the heat to medium and sprinkle half of the flour over the sausage, stirring to dissolve it. Add the rest of the flour and again stir for about 1 minute, until all of the flour has been dissolved.
9. Slowly pour in the milk, stirring constantly as it is added. Cook the gravy, stirring frequently, until it begins to thicken (10 to 15 minutes). Season the gravy with the black pepper and seasoned salt and continue to cook until it is very thick. Spoon the gravy over the buttermilk biscuits to serve. Leftover gravy can be stored in an airtight container in the refrigerator. If it is too thick when reheated, simply add a splash or two of milk to thin it out a bit.

Thursday, June 27, 2013

Strawberry Pimm's Cup Cocktail


INGREDIENTS:
For the Strawberry Syrup:
16 ounces fresh strawberries, hulled and rinsed
1 cup granulated sugar

For the Drink:
Ice
2 ounces Pimm's No. 1
1 ounce lemon juice
1 ounce Strawberry Syrup
2 ounces 7UP or ginger ale
Sliced cucumber, strawberries and fresh mint to garnish

DIRECTIONS:
1. Make the Strawberry Syrup: Puree the strawberries in a blender or food processor until smooth. Press the mixture through a fine-mesh sieve and measure out 1 cup of the strawberry puree. Add it, along with the sugar, to a small saucepan and bring to a light boil over medium-high heat, stirring until the sugar has dissolved. Remove from heat and allow to cool to room temperature. (The strawberry syrup can be kept in an airtight container in the refrigerator for up to a month.)

2. Make the Drink: In a cocktail shaker with ice, combine the Pimm's No. 1, lemon juice and 1 ounce of the strawberry syrup and shake. Strain into an ice-filled glass and top with the 7UP. Garnish with sliced cucumber, strawberries and a sprig of fresh mint.

NOTES:
  • The garnish is not necessary for the flavor, but smelling that cucumber and mint with each sip adds a surprisingly wonderful-ness to the drink.
  • We happened to have a bottle of lemon sour open, so we used that instead of sprite.  It's a solid choice.
  • When I made the strawberry syrup, I strained it through my wire mesh strainer and very little was strained out.  (Some of the seeds, probably not the majority.  I'm not convinced this is a necessary step.)
  • Thanks to Brown Eyed Baker (my new hero)

Sunday, June 9, 2013

Bacon Cauliflower Salad


1 medium head cauliflower, broken into florets
1 pound sliced bacon, cooked and crumbled
1 cup cubed cheddar cheese
1 cup frozen peas (fresh would be awesome!)
1 medium onion, chopped (optional)
1 cup Miracle Whip
2 to 4 teaspoons sugar

NOTES:
Very good.  Instead of starting from scratch on the bacon, I just used this secret ingredient.  It's very nice to have around for salads, omelets, etc. and since people are using is with a decent amount of restraint, I can justify keeping a package around for random bacon needs.  (You know ... "needs.")

Tuesday, June 4, 2013

Basic Sandwich Loaf

Adapted from this recipe.

yield: two 8"x4" loaves

Dough Starter (Sponge)

  • 12 ounces unbleached all-purpose flour (2¼ cups plus 2½ T)
  • 1 cup milk
  • ¾ cups water, room temperature
  • 1½ ounces honey (2T plus 1 tsp)
  • ¾ tsp instant yeast

Flour Mixture and Dough

  • 11 ounces whole wheat (or white whole wheat) flour (2 cups plus 3 T)
  • ¾ tsp instant yeast
  • ½ cup butter
  • 2 tsp salt
Scald the milk by microwaving it for 1 minute on high. Meanwhile, combine the white flour, honey, and yeast in a large mixing bowl. Combine the water and milk, and whisk into the flour mixture briskly until smooth, to incorporate air into the starter.

Sprinkle half of the whole wheat flour over the sponge, sprinkle the yeast over the flour, then add the remaining flour in an even layer. Cover tightly with a lid or plastic wrap and let sit at room temperature one to four hours. Set out the stick of butter to soften.

Add the salt and butter, and work the dough together in the bowl with your hand. When it comes together, knead for a few more minutes (five total). The dough will be quite sticky, but try not to add too much flour. Form the dough into a ball on the counter and turn the bowl upside down over it on the counter. Let rest 20 minutes, then knead for five more minutes. (The dough should be easier to handle this second time). Return the dough to the bowl, flatten the surface, cover tightly and let rise until doubled, 1 to 1½ hours.

Turn the dough out onto the counter and flatten gently into a rectangle, without squishing out too much air. Fold it in thirds like a letter, turn and fold in thirds again. Flip it over, return it to the bowl, and gently flatten. Let rise again until doubled, about an hour.

Turn out the dough and cut it in half. Shape each piece by pressing or rolling it into a rectangle with the long side facing you, deflating any very large bubbles with your fingertips. Fold one side in to the center, then fold the other side to meet or slightly overlap it. Starting at the top, roll up the dough, pulling on the roll to stretch it slightly as you roll. Seal the edge, and if necessary, roll the loaf under your hands until it is as long as your loaf pan. Place the loaves into greased pans, cover and let rise until the center is 1" above the top of the pans.

Set an oven rack in the lowest position. If you have a baking stone, set it on the rack. Preheat the oven to 350º. Set the bread pans on the stone and bake 50 minutes, turning halfway. (When done, an instant-read thermometer inserted into the bottom of the loaf should read 210º.) Remove from pans and cool on a rack.

Notes: Measuring by weight instead of volume guarantees consistent results with minimal effort, but if you don't have a scale, reserve a half-cup or so of the flour and add later as needed to get the texture right.

I use a Pyrex 8-cup measuring cup for the mixing bowl. It has a lid so you don't need saran wrap, it's easy to keep an eye on progress with the markings, and this recipe is doubled just when it reaches the lid for the first rise, and when it starts to lift the lid off the bowl for the second rise.


If you prefer, you may substitute water for the milk and add ¼ cup dry milk to the whole wheat flour.

This recipe stores well for about a week.

Tuesday, April 30, 2013

Crock Pot Lasagna

I used a 3 cup package of my own sauce plus a 15 ounce can of Hunts tomato sauce to make this recipe.

It's good and easy, and I'd definitely make it again.  The only difference I'd make (besides the sauce) is to add an extra layer of noodles.  Even after sitting with the lid off for 10 minutes, it's still a little soupy.

Crock Pot Lasagna 

1 pound Lean Ground Beef
1 jar Spaghetti Sauce
2 cups Cottage Cheese
2 cups Shredded Mozzarella Cheese
½ cups Parmesan Cheese, Shredded
6 whole Lasagna Noodles, Regular, Uncooked
¼ cups Water
 
  • In frying pan, brown ground beef and drain fat.
  • Add water and pasta sauce, reserving a small amount of sauce to line bottom of crock pot. Stir until well blended.
  • Line bottom of crock pot with very thin layer of sauce, then top with 2-3 uncooked lasagna noodles that are broken to fit shape (some overlap is fine).
  • Cover noodles with half the cottage cheese, mozzarella cheese, and Parmesan cheese, then top cheeses with half of the meat mixture.
  • Repeat layers with the other half of the ingredients. Cook on low for 4 hours.

Friday, April 12, 2013

Bacon Dill Tea Sandwiches


8 oz. Cream Cheese (softened)
1/3 c mayonnaise
5 slices bacon (finely chopped)
1 tbls green onion (chopped)
1 tsp dill weed
1/8 tsp pepper
1 c. toasted slivered almonds

Mix ingredients until well combined.  Spread half of the bread with a think coat of mayo.  Spread the other bread with the cream cheese mixture.  To make each sandwich, cut off crusts, and cut into three parallel sections, or four triangles.

NOTES:
I made this for the 2012 tea but served openfaced on thin rye bread.

Sunday, April 7, 2013

Homemade Cheez-its


Makes about 1 quart

3 T boiling water
1 T annatto seeds (optional), coarsely ground
6 ounces (1½ cups) finely grated sharp cheddar cheese
4 T (2 ounces) unsalted butter, softened
1½ tsp salt
½ tsp black pepper
½ cup plus 2 tablespoons (3¼ ounces) all-purpose flour
2 T cornstarch

If using annatto, combine water and annatto seeds. Let steep for 5 minutes. Strain and discard seeds. Put annatto seed water in ice bath until cool.

Using stand mixer fitted with a paddle, combine cheese, butter, 1 teaspoon salt, and pepper until combined and starting to stick to sides of mixing bowl, about 30 seconds. Add flour and cornstarch and mix until combined, about 1 minute. Add 2 tablespoons of annatto seed water or plain cool water and mix until dough ball forms, about 10 seconds. Add remaining 1 tablespoon water if needed. Transfer dough to floured counter and flatten into a disk. Wrap in plastic, and refrigerate until chilled, about 30 minutes.

Adjust oven racks to upper-middle and lower-middle positions and heat oven to 375 degrees. Line 2 rimmed baking sheets with parchment paper.

Unwrap dough onto well floured counter and roll to 1/16 inch thickness. Cut into 1-inch squares. Using the blunt end of a skewer, poke a hole in the center of each square. Transfer to baking sheets. Sprinkle with remaining ½ teaspoon salt. Bake until light golden around edges, about 18 minutes, switching and rotating sheets halfway through baking. Let cool completely on baking sheets. (Crackers can be stored in airtight container at room temperature for up to 3 days).

Notes: These baked up crispy and very tasty, if a tad greasy. My crackers were plenty orange without the annatto. Make sure you roll these quite thin (the dough should be translucent) as they rise about 4x in the oven. I did one pan where I spread the crakers out a bit, and one where they were left next to each other on the baking mat. The former baked up crisper.

Sunday, March 24, 2013

Brussels Sprouts with Bacon


3 slices bacon, chopped
1 tablespoon extra-virgin olive oil
1 1/2 pounds Brussels sprouts, trimmed, small spouts left whole, larger spouts halved
Salt and pepper, to your taste
1 cup chicken broth

Brown bacon in a medium skillet over medium high heat. Remove bacon to a paper towel lined plate. Add extra-virgin olive oil to the pan, 1 turn. Add shallots to the pan and saute 1 to 2 minutes. Add Brussels spouts and coat in oil. Season with salt and pepper. Cook Brussels sprouts 2 to 3 minutes to begin to soften, then add broth. Bring broth to a bubble, cover and reduce heat to medium low. Cook 10 minutes, until tender. Transfer sprouts to a serving dish with a slotted spoon and top with cooked bacon bits.

Thursday, March 14, 2013

The Darkest Chocolate Ice Cream in the World

Makes a generous quart.

Chocolate Syrup:
1/2 cup unsweetened cocoa powder
1/2 cup brewed coffee
1/2 cup sugar
1 1/2 ounces bittersweet chocolate (55-70% cacao), finely chopped

Ice Cream Base:
2 cups whole milk
1 tbls plus 1 tsp corn starch
1 1/2 ounces cream cheese, softened
1/8 tsp fine sea salt
1 cup heave cream
1/2 cup sugar
2 tbls light corn syrup.

PREP:
For the chocolate syrup:
Combine the cocoa, coffee, and sugar in a small saucepan, bring to a boil over medium heat, stirring to dissolve sugar, and boil for 30 seconds.  Remove from heat, add the chocolate, and let stand for 5 minutes.
Stir until smooth and set aside.

Fir the ice cream base:
Mix about 2 tbls of the milk with the cornstarch in a small bowl to make a slurry.
Whisk the cream cheese, warm chocolate syrup, and salt in a medium bowl until smooth.

COOK:
Combine remaining milk, cream, sugar, and corn syrup, in a 4 qt. saucepan and bring to a rolling boil over medium high heat and boil for 4 minutes.
Remove from the heat, and gradually whisk in the cornstarch slurry.
Bring the mixture back to a boil over medium-high heat and cook, stirring with a heatproof spatula, until slightly thickened, about one minute.  Remove from heat.

CHILL:
Gradually whisk the hot milk mixture into the cream cheese mixture until smooth.  Pour the mixture into a gallon zip-loc and submerge in an ice bath until cold - about 30 minutes.

FREEZE:
Pour ice cream base into frozen canister and spin until thick and creamy.
Meanwhile, melt the chocolate in a double boiler.  Remove from the heat and let cool until tepid but still fluid.

Chill at least 4 hours.

MY NOTES:
I chilled it in a tupperware in the fridge instead of the zip-loc (too much trouble)
Source: Jenni's Splendid Ice Creams at Home
I haven't made this recipe, but Em has and highly recommends it.

Vanilla Bean Ice Cream

Makes about 1 quart.

2 cups whole milk
1 tbls. plus 1 tsp cornstarch
1 1/2 ounces (3 tbls.) cream cheese, softened
1/8 tsp fine sea salt
1 1/4 cups heavy cream
2/3 cup sugar
2 tbls light corn syrup
1 vanilla bean (I used vanilla bean paste)

PREP:
Mix about 2 tbls of the milk with the cornstarch in a small bowl to make a slurry.
Whisk the cream cheese and salt in a medium bowl until smooth.

COOK:
Combine remaining milk, cream, sugar, corn syrup, and vanilla (seeds and bean) in a 4 qt. saucepan and bring to a rolling boil over medium high heat and boil for 4 minutes.
Remove from the heat, and gradually whisk in the cornstarch slurry.
Bring the mixture back to a boil over medium-high heat and cook, stirring with a heatproof spatula, until slightly thickened, about one minute.  Remove from heat.

CHILL:
Gradually whisk the hot milk mixture into the cream cheese mixture until smooth.  Pour the mixture into a gallon zip-loc and submerge in an ice bath until cold - about 30 minutes.

FREEZE:
Remove the vanilla bean.
Pour ice cream base into frozen canister and spin until thick and creamy.
Chill at least 4 hours.

MY NOTES:
I used the equivalent of vanilla bean paste (read the jar for the amount)
I chilled it in a tupperware in the fridge instead of the zip-loc (too much trouble)
Source: Jenni's Splendid Ice Creams at Home

The Buckeye State Ice Cream

Makes about 1 quart.

2 cups whole milk
1 tbls plus 1 tsp cornstarch
1 1/2 ounce (3 tbls) cream cheese, softened
1/2 cup unsalted, natural peanut butter
1/2 tsp. fine sea salt (less if using salted peanut butter)
1 1/4 cup heavy cream
2/3 cup sugar
2 tbls light corn syrup
2 tbls honey
4 ounces chocolate (55%-70% cacao), chopped

PREP:
Mix about 2 tbls of the milk with the cornstarch in a small bowl to make a slurry.
Whisk the cream cheese, peanut butter, and salt in a medium bowl until smooth.

COOK:
Combine remaining milk, cream, sugar, corn syrup, and honey in a 4 qt. saucepan and bring to a rolling boil over medium high heat and boil for 4 minutes.
Remove from the heat, and gradually whisk in the cornstarch slurry.
Bring the mixture back to a boil over medium-high heat and cook, stirring with a heatproof spatula, until slightly thickened, about one minute.  Remove from heat.

CHILL:
Gradually whisk the hot milk mixture into the cream cheese mixture until smooth.  Pour the mixture into a gallon zip-loc and submerge in an ice bath until cold - about 30 minutes.

FREEZE:
Pour ice cream base into frozen canister and begin to spin.
Meanwhile, melt the chocolate in a double boiler.  Remove from the heat and let cool until tepid but still fluid.
When the ice cream is thick and creamy and almost finished, drizzle the melted chocolate slowly through the opening in the top of the ice cream machine and allow it to solidify and break up in the ice cream for about 2 minutes.
Chill at least 4 hours.

MY NOTES:
I used plain ole' Jiff of whatever I had around and just reduced the salt
I chilled it in a tupperware in the fridge instead of the zip-loc (too much trouble)
Source: Jenni's Splendid Ice Creams at Home

Lemon Frozen Yogurt

Frozen Yogurt Base:
1 qt. plain low-fat yogurt (or 1 1/4 cups Greek Yogurt)*
1 1/2 cups whole milk
2 tbls. cornstarch
2 ounces (4 tbls.) cream cheese, softened
1/2 cup heavy cream
2/3 cup sugar
1/4 cup light corn syrup
zest from one lemon (reserved from below)

Lemon Syrup:
2-3 lemons
3 tbls. sugar

Advance Prep:
*Strain yogurt through 2 layers of cheesecloth for 6-8 hours (covered in the fridge).
Discard the liquid, and measure out 1 1/4 cups of the drained yogurt.

Prep:
For the lemon syrup:
Using a vegetable peeler or sharp knife, remove the zest in large strips from 1 lemon; reserve for the frozen yogurt.  Juice enough of the lemons to make 1/2 cup.Combine the lemon juice and sugar in a small saucepan and bring to a boil over medium-high heat, stirring to dissolve the sugar.  Remove from the heat and let cool.

For the Frozen yogurt base:
Mix about 2 tbls. of the milk with the cornstarch in a small bowl to make a smooth slurry.
Whisk the cream cheese in a medium bowl until smooth.
Fill a large bowl with ice and water.

Cook:
Combine the remaining milk, the cream, sugar, corn syrup, and lemon zest in a 4 qt. saucepan, bring to a rolling boil over medium-high heat, and boil for 4 minutes.  Remove from the heat and gradually whisk in the cornstarch slurry.
Bring the mixture back to a boil over medium-high heat and cook, stirring with a heatproof spatula, until slightly thickened, about 1 minute.  Remove from heat.

Chill:
Gradually whisk the hot milk mixture into the cream cheese until smooth.  Add the reserved 1 1/4 cups yogurt and the lemon syrup and whisk until smooth.
Pour the mixture into a 1-gallon zip-loc and submerge it in ice.  Let stand until cold, about 30 minutes.

Freeze:
Remove the zest from the frozen yogurt base.  Pour into canister and spin until thick and creamy.  Freeze at least 4 hours.

MY NOTES:

  • I used the immersion blender to mix the parts together (slurry, cream cheese, yogurt, etc.)
  • I tried the zip loc idea to cool it quickly once but not the second time.  It was too pesky to get it all out of the bag.
  • Source: Jenni's Splendid Ice Creams at Home

Saturday, February 9, 2013

Baked Salmon


2 cloves garlic, minced
6 tablespoons light olive oil
1 teaspoon dried basil
1 teaspoon salt
1 teaspoon ground black pepper
1 tablespoon lemon juice
1 tablespoon fresh parsley, chopped

In a medium glass bowl, prepare marinade by mixing garlic, light olive oil, basil, salt, pepper, lemon juice and parsley. Place salmon fillets in a medium glass baking dish, and cover with the marinade. Marinate in the refrigerator about 1 hour, turning occasionally.
Preheat oven to 375 degrees F (190 degrees C).
Place fillets in aluminum foil, cover with marinade, and seal. Place sealed salmon in the glass dish, and bake 35 to 45 minutes, until easily flaked with a fork.

NOTES:

  • Good and easy.
  • I used dried parsley.
  • Source

Wednesday, February 6, 2013

Macaroni and Cheese 2


8 oz. elbow macaroni
4 Tbsp. butter, divided
2 Tbsp. flour
1/2 tsp. salt
1/2 tsp. dry mustard (I omitted this because I didn’t have any)
2 cups milk
1/2 cup cheddar cheese, divided
1/2 cup mozzarella cheese, divided
1/2 cup swiss cheese, divided
1/2 cup seasoned bread crumbs

1) Cook macaroni according to package directions; drain.

2) Preheat oven to 400 degrees.

3) Melt 2 T. butter in a large saucepan over medium heat. Add flour and salt and stir until mixture is smooth. Stir in dry mustard. Add milk gradually, stirring constantly.

4) Cook over low heat, stirring constantly, until thickened, about 5 minutes.

5) Stir in 1/4 cup of the cheddar, 1/4 cup of the mozzarella, and 1/4 cup of the swiss. Mix cheese sauce and macaroni in a large bowl. Spoon into a 9 x 7 inch baking dish. Sprinkle with remaining cheddar, mozzarella and swiss.

6) Melt remaining butter in saucepan over medium heat. Combine bread crumbs and melted butter in a small bowl and mix well. Sprinkle on top of the cheese. Bake until hot and bubbly, about 15 minutes.

MY NOTES:

  • This is almost identical to my go-to recipe, but the variety of cheeses makes it a lot better.
  • I added a small amount of ham - a good choice.  (Bacon would also be pretty outstanding, but I didn't have any thawed.)
  • Instead of bread crumbs, I just sprinkled garlic croutons on top of it all.  Very good!
  • Recipe source.


Saturday, January 26, 2013

Peanut Butter Banana Bread with Chocolate Chips


2 cups all-purpose flour
¾ teaspoon baking soda
½ teaspoon salt
3 medium bananas, mashed
½ cup creamy peanut butter
½ cup granulated sugar
½ cup light brown sugar
⅓ cup buttermilk
¼ cup vegetable oil
2 eggs
2 teaspoons vanilla extract
1 cup semisweet chocolate chips

DIRECTIONS:
1. Preheat oven to 350 degrees F. Grease an 8x4-inch loaf pan and then line with parchment paper so that it hangs over the two long sides.

2. In a large bowl, whisk together the flour, baking soda and salt; set aside.

3. In a separate large bowl, whisk together the banana, peanut butter, sugars, buttermilk, oil, eggs and vanilla extract until smooth.

4. Pour the wet ingredients into the flour mixture and fold together with a rubber spatula until completely combined and there are no spots with raw flour. Gently stir in the chocolate chips.

5. Transfer the batter to the prepared loaf pan, smoothing the top into an even layer. Bake until the loaf is golden brown and a toothpick or thin knife inserted into the center comes out with just a few moist crumbs, 1 hour to 1 hour 15 minutes. If your bread appears to be browning too quickly, place a tented piece of foil over it (I did this at the 45-minute mark).

6. Allow the bread to cool in the pan for about 10 minutes, then turn it out onto a wire rack to cool completely. The cooled bread should be wrapped tightly in plastic wrap; it can be stored at room temperature for up to 5 days.

NOTES:

  • Recipe credit
  • This definitely made enough batter for two smaller pans.  I thought it might overflow and put a pan under it just in case.  (It didn't.)
  •  In my single pan, it took a lot longer to bake.  I kept going until the internal temperature was 190.
  • I used mini chips so mine looks a lot more chocolaty.  Fewer minis would also work.
  • It tastes yummy and is staying moist, even after a few days.